Custom Caller ID
Next-Gen SIP Trunking
The following information applies only to SIP Trunking accounts created on Cymbus's Next-Gen platform after January 2024. If you aren't sure whether this applies to you, contact Customer Support for assistance.
Custom Caller ID for SIP Trunking gives businesses the flexibility to display toll-free numbers, department-specific lines, or local presence numbers—regardless of the caller ID setting configured on their PBX—so callers see the right number for the right call.
To configure Custom Caller ID, service providers assign a pool of numbers to SIP trunks, add a set of custom caller ID phone numbers, then map each originating number to the right caller ID number. Alianza then inserts the custom caller ID number into the P-Asserted-Identity header on outbound calls while preserving the original FROM header, so the called party sees the custom caller ID number and not the number assigned by the PBX.
Interested?
Contact your Customer Success Manager to enable Custom Caller ID for SIP Trunking on your partition and let them know whether you'd also like to enable admin user access, which will allow Account Managers and Super Admin users to manage these settings in the end user portal.
Manage Numbers
Before caller ID can be customized, the originating phone numbers and caller ID phone numbers must be defined. The numbers added here are not verified, so double-check that the number entered is exactly what it should be.
Go to SIP Trunk > Custom Caller ID.
In the right corner, select [Manage Numbers] to open the modal.
Originating Numbers
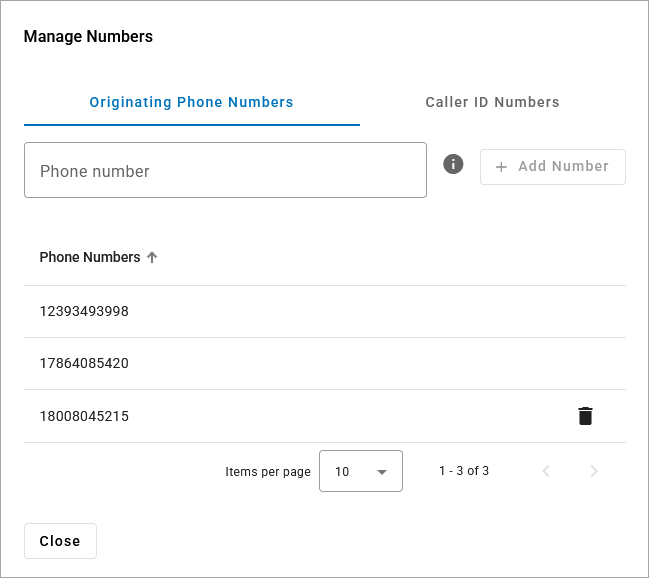
In the Manage Numbers modal, select the Originating Phone Numbers tab, phone numbers assigned to the SIP trunk are displayed below by default and cannot be removed. Enter any additional outbound phone numbers or wildcard ranges from your PBX in the Phone number field.
To remove an added number, select  Delete on the right. If the number was assigned to a caller ID number, the assignment will also be deleted.
Wildcards
Wildcards can be used to indicate a range of originating numbers. To enter a wildcard range, enter the phone number and use an asterisk (*) to represent one or more missing digits. For example:
* = Any phone number
801* or 1801* = Any number with the 801 area code
801555123* = A range from 8015551230 to 8015551239
More inclusive patterns take priority. If you assign a custom caller ID to 801* and a different caller ID to 8015551234, the 801* assignment takes precedence. This happens regardless of the order they appear in the system.
Caller ID Numbers
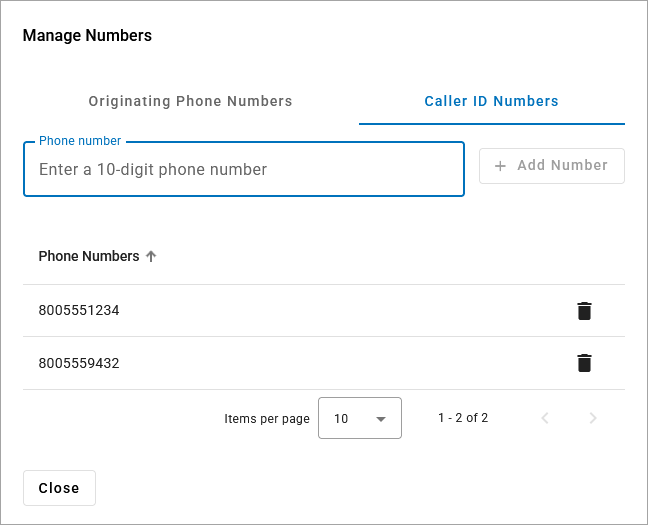
In the Manage Numbers modal, select the [Caller ID Numbers tab], then enter any 10-digit phone numbers that will be used as caller ID. These numbers will be mapped to originating phone numbers later.
To remove a custom caller ID number from the list, select Delete on the right. If the number was assigned to an originating number, the assignment will also be deleted.
Map Assignments
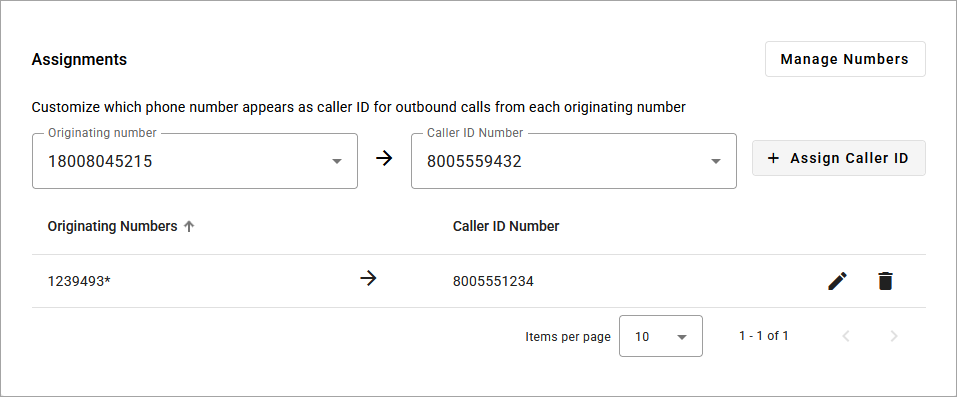
Now that your numbers are defined, map each number so Alianza knows which custom caller ID to use for each originating number. Caller ID assignments take effect immediately for new calls.
Go to SIP Trunk > Custom Caller ID.
Under Assignments, select an originating number from the first menu.
Select a caller ID number from the second menu.
Select [Assign Caller ID] to save the pairing.
Repeat these steps for each originating number you need to map.
One Caller ID Per Originating Number
Each originating number can be assigned to only one caller ID number. A custom caller ID can be assigned to multiple originating numbers, but not the reverse. If you submit a duplicate originating number, it will overwrite the previous assignment.
Edit an Assignment
The caller ID number for each originating number can be modified as needed.
Locate the originating number in the list, then select
 Edit on the right.
In the Assign Caller ID field, select a new caller ID number.
Select [Save].
Delete an Assignment
To remove the mapping between an originating number and a caller ID, locate the assignment in the list and select Delete on the right.
To delete a phone number entirely (whether originating or custom caller ID), go back to Manage Numbers and select Delete. Any assignments for that number will also be deleted. Phone numbers assigned to the SIP trunk cannot be deleted.
Disable Custom Caller ID for SIP Trunking
To disable Custom Caller ID for SIP Trunking for all accounts on your partition, contact your Customer Success Manager for assistance. Once disabled, all existing assignments will remain active but will no longer be accessible in the Admin Portal. If the caller ID assignments are not meant to be permanent, please remove them before requesting to disable the feature.