Routes Guide
Routes are the key components of an auto-attendant and play an important role in the caller's experience. When used correctly, they can guide the caller to their destination and provide alternative options if the destination is not available. Review each route below to learn more.
The Schedule route allows users to set their phone system to direct incoming calls to different destinations depending on when they call in, such as business hours, lunch hours, holidays, after-hours, etc. The Schedule route can be added at the beginning of the call flow or following a Schedule, Menu, or Failover route.
Schedules are configured separately in the tab and are assigned to auto-attendants as needed. One schedule can be assigned to multiple auto-attendants or multiple schedules can be configured in a single auto-attendant.
In the auto-attendant builder, click
 Add and select the
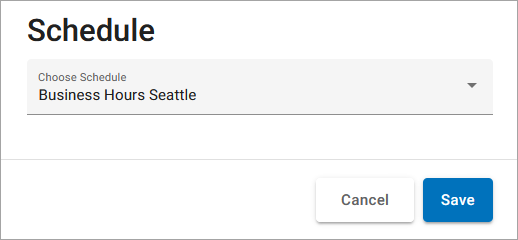
  Schedule route.
Select a schedule from the list, then click [Save].
The schedule and each of its rules are added to the auto-attendant. By default, an All other times rule is also added to identify where calls are routed during times that are set to Unavailable all day or are not specified by a rule.
For each rule, click
Add and select the next route to continue the call path.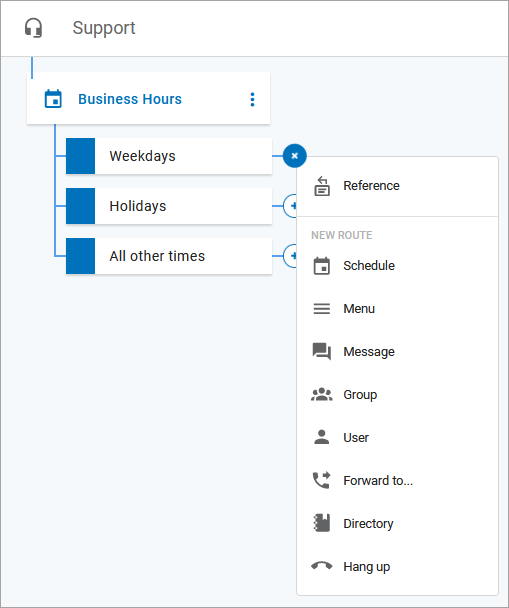
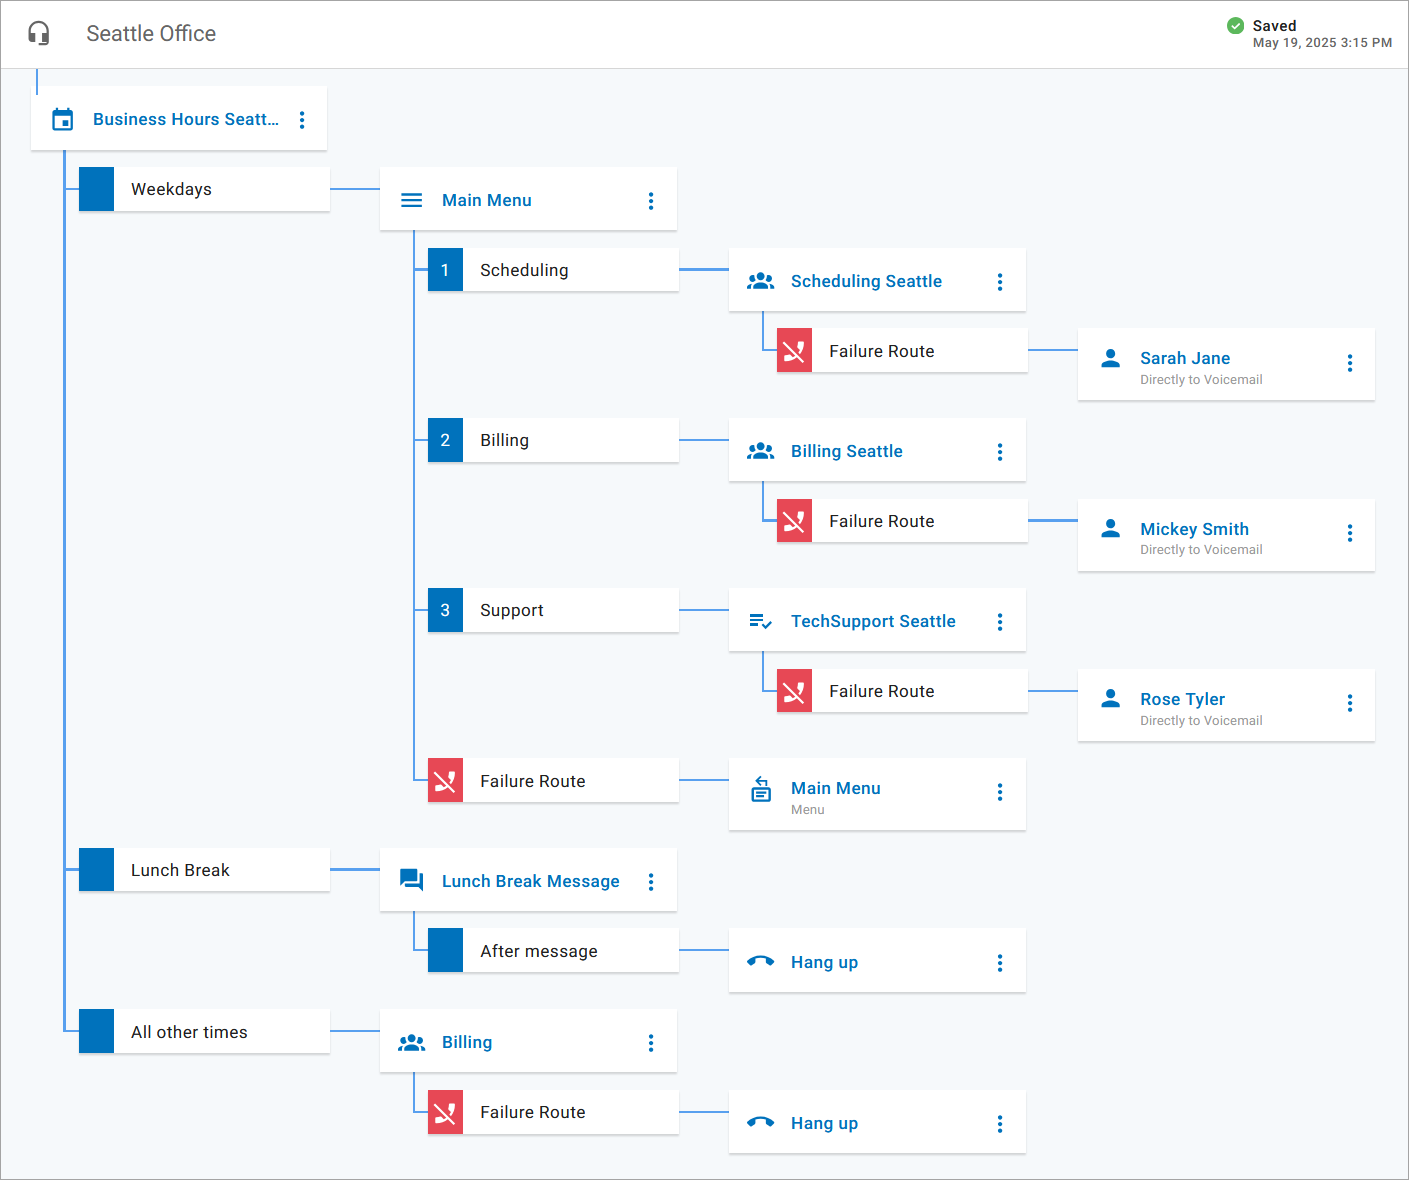
The following example shows a completed auto-attendant that begins with a Schedule route.
Change Schedule
To avoid breaking the call flow, the schedule assigned to a route can be changed only if the routes assigned to each rule are removed first. You can, however, modify existing rules in the schedule. See Schedules for details.
A Menu route directs the caller to a message and DTMF touchtone options for call routing based on the key dialed.
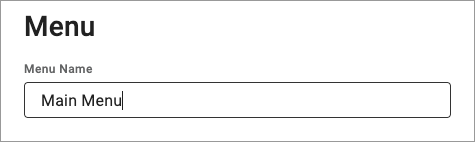
Menu Name
First, enter a name for the menu, then continue to upload your prompts.
 |
Prompts
Prompts are the recorded audio files that callers hear upon entering the menu.
The Intro Prompt plays right before the Menu prompt. Because it's a separate audio file, it can be easily switched out for various circumstances, such as announcing seasonal sales or temporary business hours. This prompt is optional.
The Menu Prompt tells callers how to navigate the menu options. For example: "Thank you for calling Acme Corp. Press 1 for Sales, 2 for Support, or 3 for Billing." This prompt is required.
For each prompt, click the menu and select a media file from the library.
To confirm you have the right one, you can
 play the file in your browser or
  download it to your computer.
If the file you need isn't listed, you can upload or record a new one in Media Files.
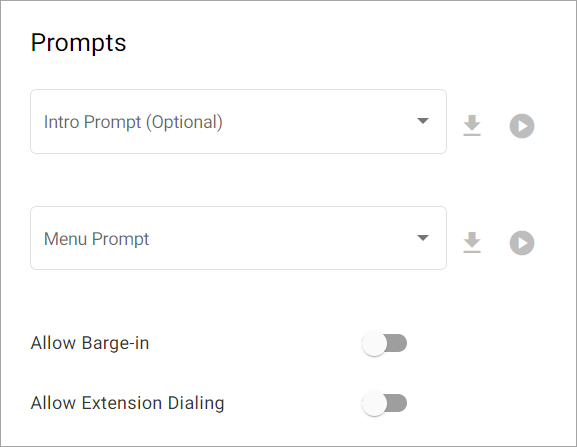 |
Allow Barge-In
Toggle on to allow callers to interrupt the Intro prompt by dialing an option (DTMF input) before they hear it.
Allow Extension Dialing
Toggle on to allow callers to dial their party's extension while the menu options are still playing. After dialing, there is a two second delay before the call is routed.
If "Allow Barge-in" is also enabled, callers can interrupt the Intro prompt as well. Because an extension may start with the same number as a menu option, there is a two second delay after a number is dialed before the call is transferred. If the dialed extension is invalid, the caller will hear “invalid extension,” and the call will end.
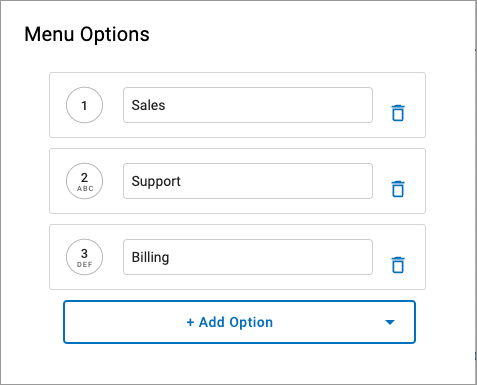
Menu Options
Add DTMF (touchtone) options (0–9, *, #). Each option will need a name and a completed route.
|  |
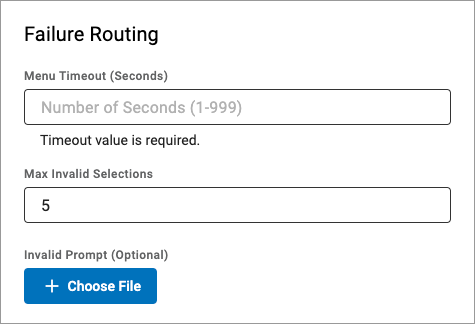
Failure Routing
 |
Field | Description |
|---|---|
Menu Timeout | Set the delay time (1–999 seconds) before the menu times out and an invalid selection is registered. If the timeout occurs, the call will loop back to the menu. Once the maximum number of invalid selections is reached, the call will be routed to the failure destination. |
Max Invalid Selections | Enter the number of invalid selections or menu timeouts that will be allowed prior to directing the call into the failure route. |
Invalid Prompt | Upload a .wav or .mp3 file under 5 MB that the caller will hear after dialing an invalid option (required). For example: "The number you entered was invalid. Please try again." |
When you're done configuring the menu, click [Save]. The menu will be added to the auto-attendant builder canvas.
 |
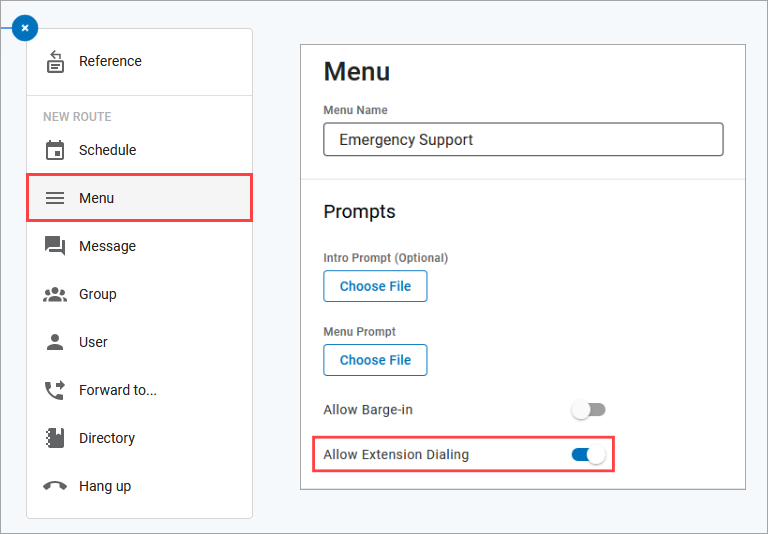
Dial by Extension, or Extension Dialing, allows a caller to interrupt an auto-attendant's Menu Prompt by dialing their party's extension, which means callers don't need to wait for the menu to stop playing before they can make a selection.
This feature can be enabled in the Menu route by toggling on "Allow Extension Dialing." Additionally, if "Allow Barge-In" is enabled, callers will also be able to interrupt the intro prompt.
 |
Once an extension is dialed, the call will be directed to that extension and will follow the call handling rules for that user.
Because an extension can start with the same number as a menu option (for example, 2001), there is a 2-second delay after a number is dialed before the system will apply the selection. However, if the caller dials the maximum number of digits allowed for an extension on that account, the call will be sent immediately.
Invalid Selections
If the caller dials an invalid extension, they will hear "invalid extension", then the call will be disconnected.
If the caller dials more than one digit but less than an extension, they will hear the "Invalid Prompt" message and the menu will repeat.
Once the caller reaches the "Max Invalid Selections" limit, the call will be disconnected.
Using the Message route, the caller will hear a prerecorded message.
Enter a name or description for the message that will be displayed in the auto-attendant editor, then click the drop-down menu and select a media file from the library.
To confirm you have the right one, you can
play the file in your browser or  download it to your computer.
If the file you need isn't listed, you can upload or record a new one in Media Files.
 |
Hunt Group and Queue routes distribute calls to a group of users based on predefined settings. Rather than following each user's call handling rules, calls follow the group's ring strategy to ensure calls are distributed properly. The first user to answer takes the call. If no one answers, the call follows the auto-attendant’s failure route.
The type of call group you need depends on the needs of the users assigned to it:
Hunt Groups distribute calls among a group of users based on a predefined call distribution strategy. If a call isn't answered, the system will "hunt" the next available agent with the same consideration. Supported features include Music On Hold, Night Forwarding, User Ring Strategy, and User Log In/Out.
Queues are similar to Hunt Groups in supported features and call distribution methods but also allow for more complex management of high call volumes. When all users are busy, callers are placed in a queue where they listen to announcements or hold music until an agent is available. Queue Announcements can be added to provide a more engaging experience and help minimize missed or abandoned calls.
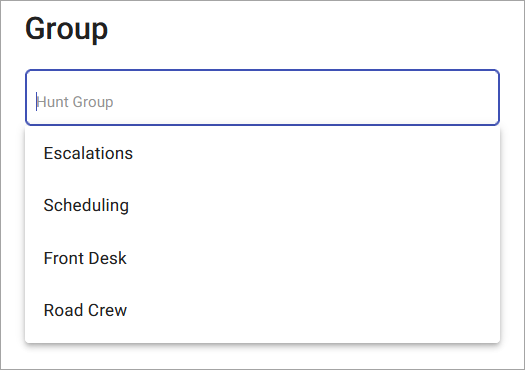
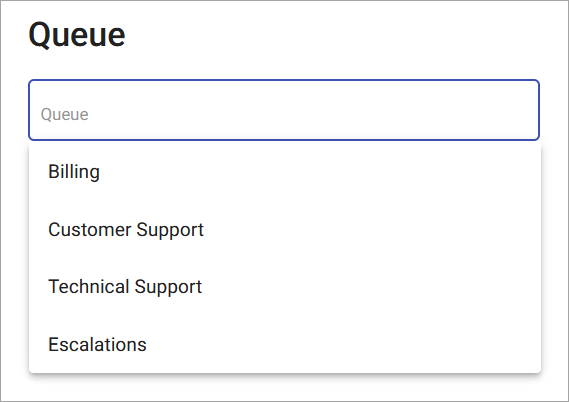
Hunt groups and queues are created and managed in Call Groups and can be assigned to one or more auto-attendants as needed. In the auto-attendant builder, add a Hunt Group or Queue route to the call flow, then select an existing group from the menu and click .
 |  |
Modify Group Settings
Because hunt groups and queues are managed in Call Groups and aren't built within the auto-attendant itself, the configurations can be modified at any time. This means you can change the queue announcements, update the Night Forwarding number, log users in or out, and change any other setting within the group as needed, without breaking the call flow for the auto-attendant(s) it's assigned to. See Hunt Groups and Queues for details.
Swap Hunt Group or Queue
As a rule, an auto-attendant cannot be edited while it is live and processing calls. However, there is an exception: the Hunt Group or Queue assigned to an auto-attendant route can be swapped in the editor at any time, so you can quickly update a call flow to route to a different team or department as needed. See Hunt Groups and Queues for details.
Go to the Auto-Attendant page.
Locate the auto-attendant you want to modify and click
 Edit to open the builder.
Open the Hunt Group or Queue route you want to swap out.
Select a new group from the menu.
Click [Save]. The change is applied immediately.
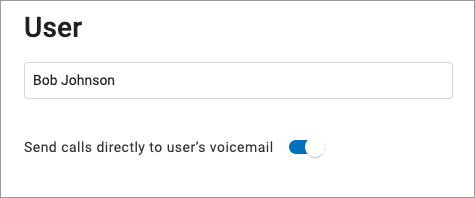
The User route directs calls to a single user, whose personal call handling settings will then apply as normal (unless "Send calls directly to voicemail" is selected).
 |
Field | Description |
|---|---|
User menu | Choose which user the incoming call will be directed to. |
Send calls directly to user's voicemail | Toggle on to bypass the user's call handling rules and routes the call directly to the user's assigned voicemail box. |
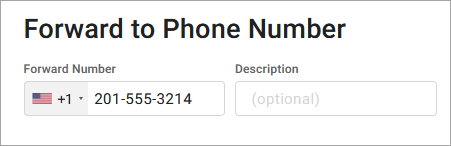
The Forward to Phone Number route directs calls to an on- or off-net phone number. Select the country code from the menu on the left, then enter the phone number and a description (optional) in the fields to the right.
 |
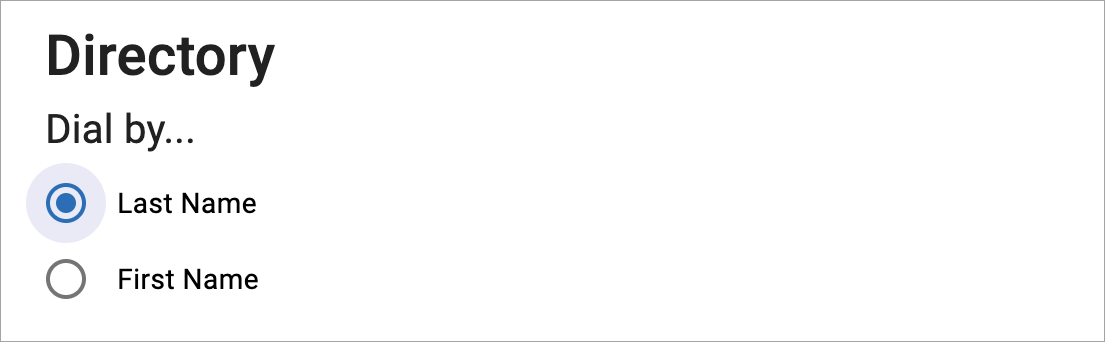
The Directory route allows the caller to dial a user in the directory using text to speech. When the caller reaches this point, they will hear, “Dial by last name” or “Dial by first name.” The caller will dial 3 or more characters of the user’s name and press #. If there is more than one matching user, the caller will select a user from a list of options.
Dial by…
Choose if callers will dial by the user's last name or first name.
 |
Custom Audio
Optionally, select custom audio prompts to give callers custom guidance in the directory. For Intro Prompt and/or Invalid Selection, click the drop-down menu and select a media file from the library.
To confirm you have the right one, you can
play the file in your browser or download it to your computer.If the file you need isn't listed, you can upload or record a new one in Media Files.
If custom audio is not used, the caller will hear the default "Dial by" prompts.
 |
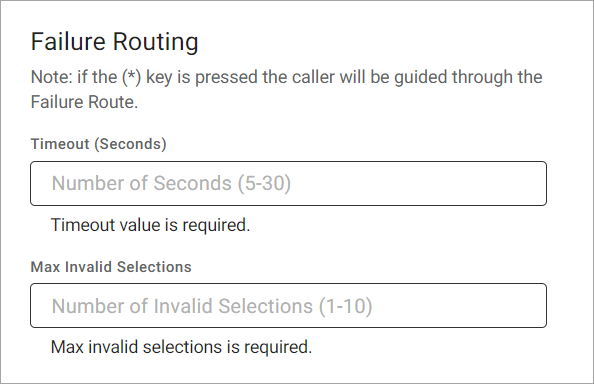
Failure Routing
A failure route is required in case the caller is unable reach the user they were looking for.
 |
Field | Description |
|---|---|
Timeout (Seconds) | Enter the number of seconds the call can be in the directory. (5–30) |
Max Invalid Selections | Enter the number of invalid selections the caller can try before the call is redirected to the failure route. (1–10) |
The Hang Up route terminates any call that reaches this point. Remember to click [Save] to keep this route.
 |
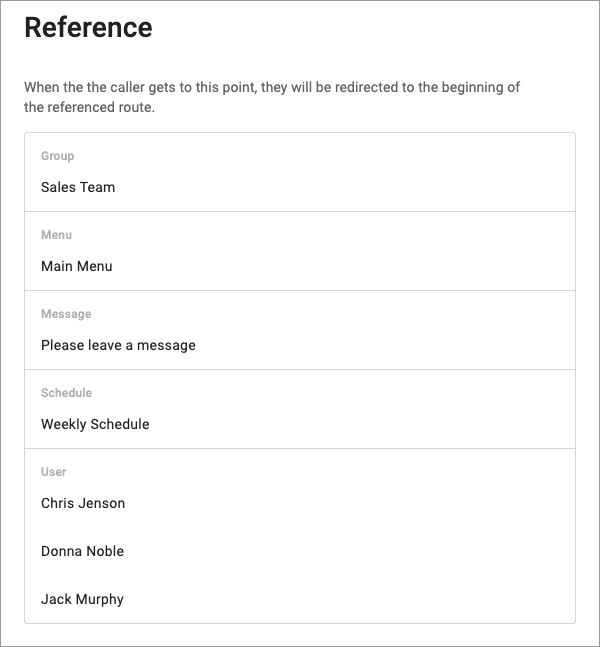
A Reference route redirects the call to another route. When a change is made in the original route, any references that use it will also be updated.
Choose which route a caller will be redirected to once they reach this point in the route, then click [Save].
 |