Trunk Groups
Next-Gen SIP Trunking
The following information applies only to SIP Trunking accounts created on Cymbus's Next-Gen platform after January 2024. If you aren't sure whether this applies to you, contact Customer Support for assistance.
SIP trunk groups are essential for businesses seeking to optimize their voice communication infrastructure. By grouping trunks together, organizations can quickly update the routing settings for all the trunks in just a few clicks, streamlining the administration, configuration, and maintenance of their voice services into one process.
For example, if trunks are grouped by region and one region experiences a large influx of calls, it would take only a few clicks to update the settings for all trunks in the group to fail over to another SIP trunk or even another region (group), eliminating all the time that would have been needed to update each trunk individually.
Shared vs Independent Settings
SIP trunks assigned to a group share call forwarding, overflow routing, and inbound failover routing settings. These group settings take precedence over the configuration set on the individual SIP trunks within the group. However, all other settings continue to be managed at the individual trunk level.
See Next-Gen SIP Trunks for details.
Shared Group Settings | Independent SIP Trunk Settings |
|---|---|
|
|
Add or Manage SIP Trunk Group
Log in to the Voice Portal and go to Account > SIP Trunks. From here, select an existing trunk to view or modify the settings, or click [+ Add SIP Trunk] in the top right to create one, then fill out or modify the information below.
Note
SIP trunks must already be created on the account before they can be added to a group. See Next-Gen SIP Trunks for details.
Group Name
Enter a name for the group that is less than 25 characters.
 |
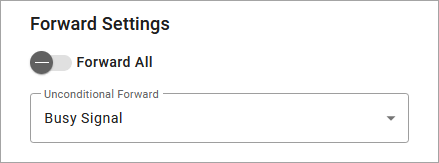
Forward Settings
Check this box to forward all inbound calls intended for the SIP trunks in this group to a specific destination. Forwarding destinations include:
User (select a user)
Auto-Attendant (select an auto-attendant)
Voicemail (select a voicemail box)
Telephone Number (enter an on- or off-net phone number)
Busy Signal
 |
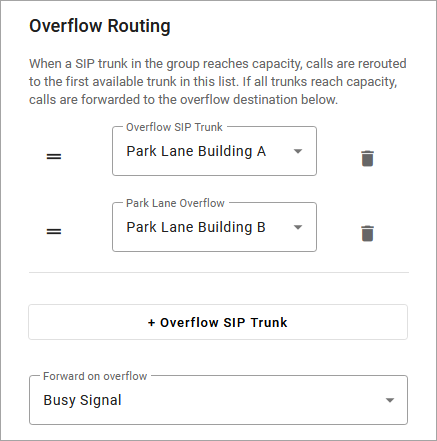
Overflow Routing
When a SIP trunk in the group reaches capacity, meaning it has as many calls as allowed by the concurrent call setting on the individual SIP trunk, calls are rerouted to the first available trunk in this list. If all trunks reach capacity, calls are forwarded to the overflow destination below.
Add Overflow SIP Trunk. Select a SIP trunk that inbound calls will fail over to once a trunk in this group reaches capacity. Add as many trunks as needed in priority order. To reorganize the SIP trunks, click
 and drag it to the new location.
Forward on overflow. If all SIP trunks in the group reach the concurrent call limit, calls will be forwarded to the following destination:
User (select a user)
Auto-Attendant (select an auto-attendant)
Voicemail (select a voicemail box)
Telephone Number (enter an on- or off-net phone number)
Busy Signal
 |
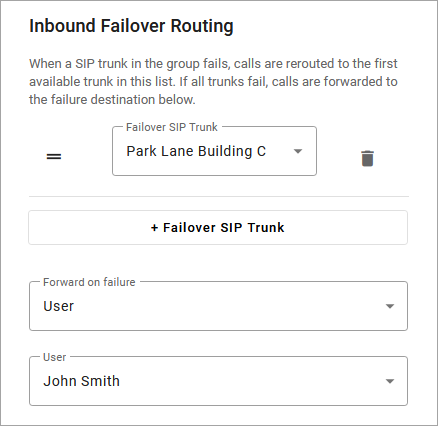
Inbound Failover Routing
When a SIP trunk in the group fails, meaning it cannot register to the platform, calls are rerouted to the first available trunk in this list. If all trunks fail, calls are forwarded to the failure destination below.
Note
Calls being routed to SIP trunks that are not in this group will not follow that SIP trunk’s fail over routing configuration.
Add Failover SIP Trunk. Select a SIP trunk that inbound calls will fail over to. Add as many trunks as needed in priority order. To reorganize the SIP trunks, click
 and drag it to the new location.
Forward on failure. Select what happens to inbound calls if all trunks fail:
User (select a user)
Auto-Attendant (select an auto-attendant)
Voicemail (select a voicemail box)
Telephone Number (enter an on- or off-net phone number)
Busy Signal
 |
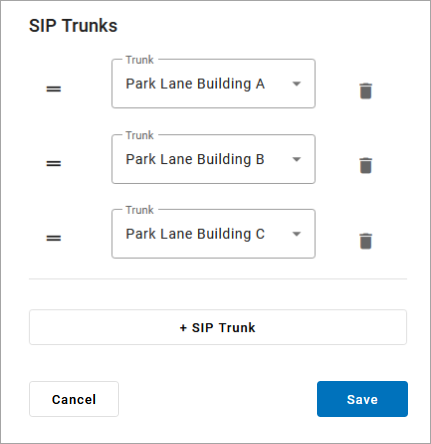
SIP Trunks
In the section, do one of the following:
To add a SIP trunk to the group, click [+ SIP Trunk] and select a trunk.
To remove a SIP trunk from the group, click
 Trash on the right.
To reorganize the SIP trunks, click
 and drag it to the new location. Functionally, the order of the trunks doesn’t matter, but you can organize them as you’d like.
When you’re done, click [Save]. The changes will be applied immediately.
 |