Edit Auto-Attendants
While an auto-attendant is live and processing calls, you can open the builder to see how it's set up, but nearly all routes are view-only to avoid disconnecting calls or otherwise breaking it. The only exceptions to this rule are Hunt Group and Queue routes, which can be swapped while the auto-attendant is live.
Here's what you can do:
Note
If you don't have access to the Auto-Attendant or Phone Numbers pages, please contact Customer Support for assistance.
Change the Call Flow
If you need to make changes to the Schedule, Menu, Message, User, Forward to, Directory, Hang Up, or Reference routes, you have a few options:
Option 1: Duplicate, Edit, Switch
In the portal, go to the Auto-Attendant page. Locate the one you want to modify and click
 Duplicate.
Click
 Edit to open the builder and make any necessary changes.
Go back to the Auto-Attendant page, find the one you just modified, and click
 Activate.
When you're ready for the new version to go live, go to the Phone Numbers page and locate the phone number assigned to the original auto-attendant. Click the destination on the right and change it to the new auto-attendant. Click .
Extensions cannot be duplicated. If the auto-attendant had an extension, remove the extension from the original and assign it to the new one.
Click the extension field on the original auto-attendant. In the pop-up, delete the extension, then click .
Click the extension field on the duplicated auto-attendant. In the pop-up window, enter the extension, then click.
Go to the Auto-Attendant page, locate the original, and click
 Deactivate.
Delete or rename the old version, so users don't confuse them.
Option 2: Deactivate, Edit, Reactivate
To avoid breaking an active call flow, make these changes after hours when you're sure calls aren't coming in for as long as it will take to make changes.
In the portal, go to the Phone Numbers page and locate the phone number assigned to the auto-attendant you want to modify.
Click the phone number destination on the right and change it to "None" or another viable option (like a temporary auto-attendant).
Go to the Auto-Attendant page and locate the one you want to modify. Click
Deactivate.Now click
Edit to open the builder and make any necessary changes.When you're done, go back to the Auto-Attendant page, locate the auto-attendant you just modified, and click
Activate.Click the Assign Phone Number link to go to the Phone Numbers page.
Locate the phone number you want to assign, then click the destination on the right and change it back to the auto-attendant.
Click [Save]. Calls to that phone number will now be directed through the auto-attendant.
Change Schedules
Once a schedule is assigned to an auto-attendant, call flows are assigned to each rule, so it knows where to send calls during the specified times. For this reason, when a schedule is swapped out for another, all routes following the schedule will be deleted and must be rebuilt before the auto-attendant can be launched.
Duplicate. Copy the auto-attendant to enable editing.
To the right of the auto-attendant that needs to be updated, click
Duplicate. A copy will be made with “copy of” at the beginning of the title.Locate the “copy of” auto-attendant you just created, then click
 Edit to open the builder.
Swap Schedules. Assign the new schedule to the auto-attendant.
In the top left of the builder, update the name to identify it as the new version.
Click the route in the builder, then select the recently updated schedule from the menu that appears on the right.
Click . All routes following the schedule, except for those following the All other times rule, will be cleared.
Rebuild. To the right of each rule, click
 Plus to add a new route, then rebuild the auto-attendant as you had it before. See Auto-Attendant Setup Guide and Auto-Attendant Routes Guide for more information.
Activate. Back on the Auto-Attendant page, locate the new auto-attendant and click
Activate. The auto-attendant routes are now locked and cannot be edited.Launch. To avoid breaking active call flows, we recommend performing this step after hours, when there are no calls in the auto-attendant.
Click ] to go to the Phone Numbers page.
Locate the phone number assigned to the original auto-attendant, then click
 Destination on the right and change it to the new auto-attendant.
Finally, click to go live.
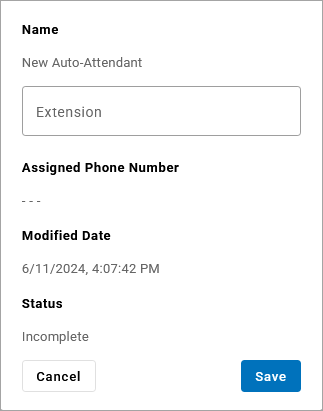
Change Extension
The extension assigned to an auto-attendant can be updated at any time:
Go to the page.
From the list of auto-attendants, locate the one you're looking for and click the Extension field.
Add, change, or remove the extension, then click [Save].
Remap Migrated Hunt Groups or Queues
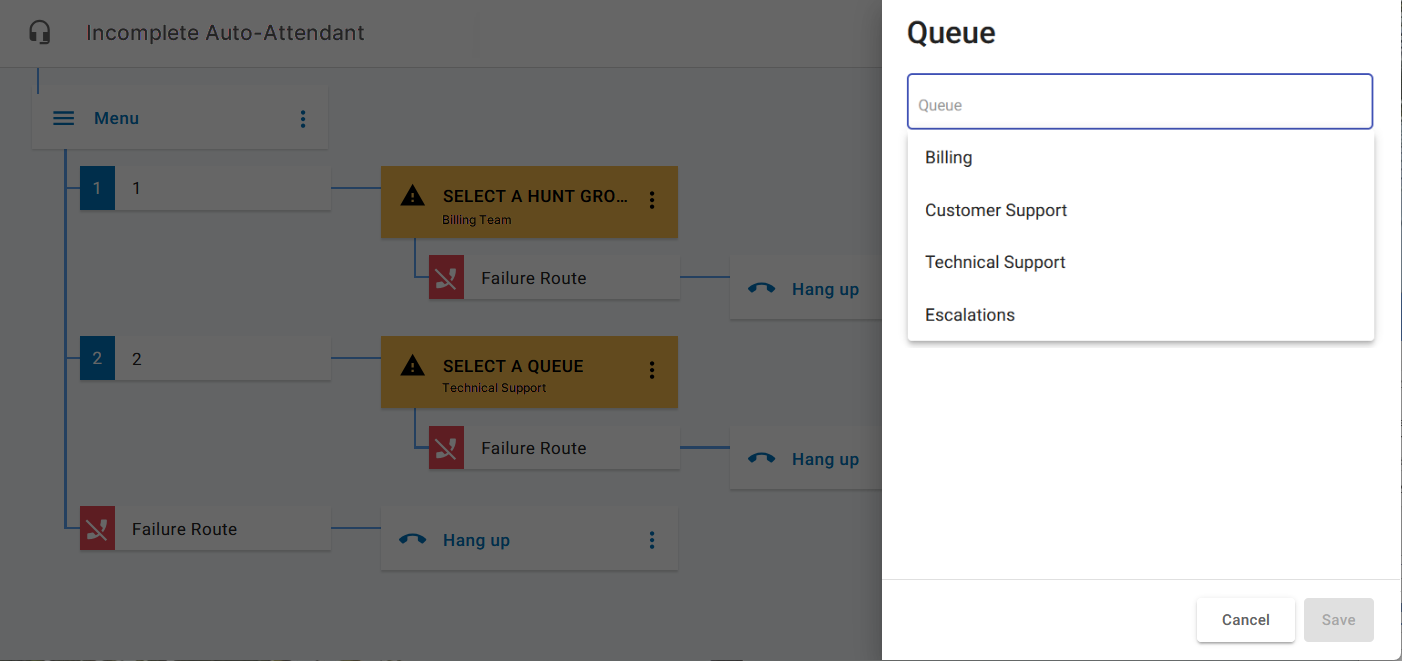
In April 2025, hunt groups and queues were split out of the auto-attendant and rebuilt as standalone objects in Call Groups. At that time, groups in Activated or Live auto-attendants were automatically migrated to Call Groups to not disrupt the call flows. However, hunt groups and queues assigned to Incomplete and Ready to Activate auto-attendants could not be migrated. Those groups must be rebuilt before they can be assigned to the auto-attendant.
First, go to Call Groups and create a new hunt group or queue.
Next, go to Auto-Attendant and select the one you want to modify to open the builder.
A yellow alert is displayed where a hunt group or queue configuration used to be. Click that box and select a hunt group or queue from the list.
Click [Save] to assign the call group to the route.