Schedule Meetings Using Outlook Add-in
The Cymbus add-in for Outlook allows you to send Cymbus meeting invites from Outlook. In just a few clicks, you can add your Meeting URL, configure the waiting room and passcode settings, and send it to anyone with an email address. Invitees can respond from the invite email. If invitees are also Cymbus users, they will see the meeting in their Cymbus app as well.
Available on the Professional license only.
Getting Invited to a Meeting
This add-in integrates the Cymbus meetings you schedule from Outlook into your Cymbus apps, but it does not automatically populate Cymbus meeting invites from other users into Outlook. Be sure to check the Cymbus app for meetings hosted by other users.
Before You Start
Make sure your Outlook meets the requirements for the Cymbus add-in:
Your organization has a business or enterprise account for Microsoft 365, previously known as Office 365. A personal account might work with the Cymbus add-in, but it has not been tested.
Your Outlook application must be 2016 or newer. The Outlook apps on mobile phones do not work with the Cymbus add-in.
Use the new Outlook interface. The classic Outlook interface does not work with the Cymbus add-in.
Enable Cymbus Outlook Add-in for End Users
Instructions for the IT Admins
This section is performed by the IT admin at your organization.
Because the Cymbus Outlook add-in uses event-based activation, meaning it runs tasks when certain events occur, it must be deployed by an organization's admin on behalf of their end users. Event-based activation is restricted if the end user acquired the add-in directly from AppSource.
As the IT administrator for your organization, follow the steps below to enable the Cymbus add-in for your end users.
If you are using a Windows computer, open Microsoft Edge. If you are using a Mac computer, open Chrome. Using other browsers results in an error.
Go to AppSource.com and make sure you are logged in with your Microsoft 365 admin account.
Open the following flight code URL into a web browser:
https://appsource.microsoft.com/product/office/WA200006275?flightCodes=CymbusMeetings
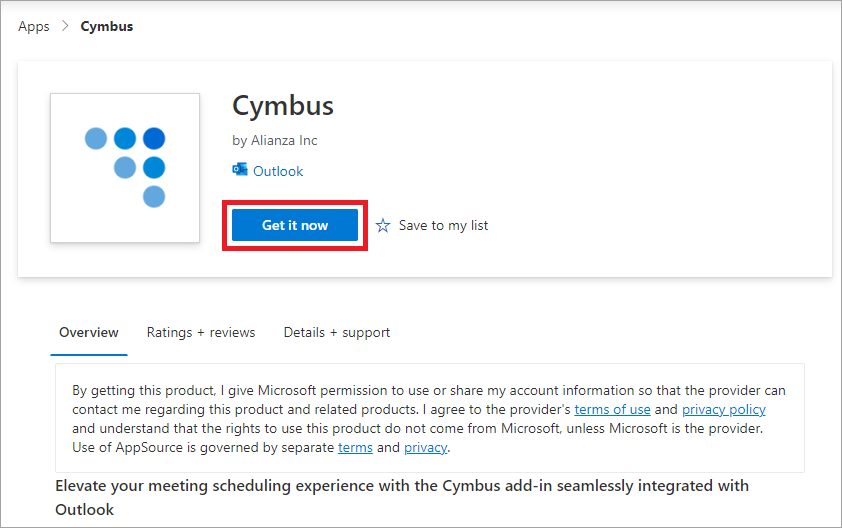
On the add-in listing page, select Get it now.

Follow the prompts to proceed.
In the Deploy New App wizard, select users to assign the Cymbus add-in to. Choose from just yourself, the entire organization, or specific users.
Review the permissions requests and click Next.
Review and finish deployment.
It can take up to six hours for the add-in to appear in Outlook. Once complete, your users see the Cymbus add-in when they create a new meeting in Outlook.
Schedule a Meeting Using Outlook
Once your IT admin enables the Cymbus add-in for your organization, it will be displayed in Outlook.
Outlook Web App
We don’t recommend running both the Outlook desktop application and the Outlook web app at the same time. It is a good habit to close the Outlook web app after every use.
Open Outlook on your desktop computer.
Click New event. Alternatively, click the time slot you want in the calendar, then click More options. The New event dialog opens.
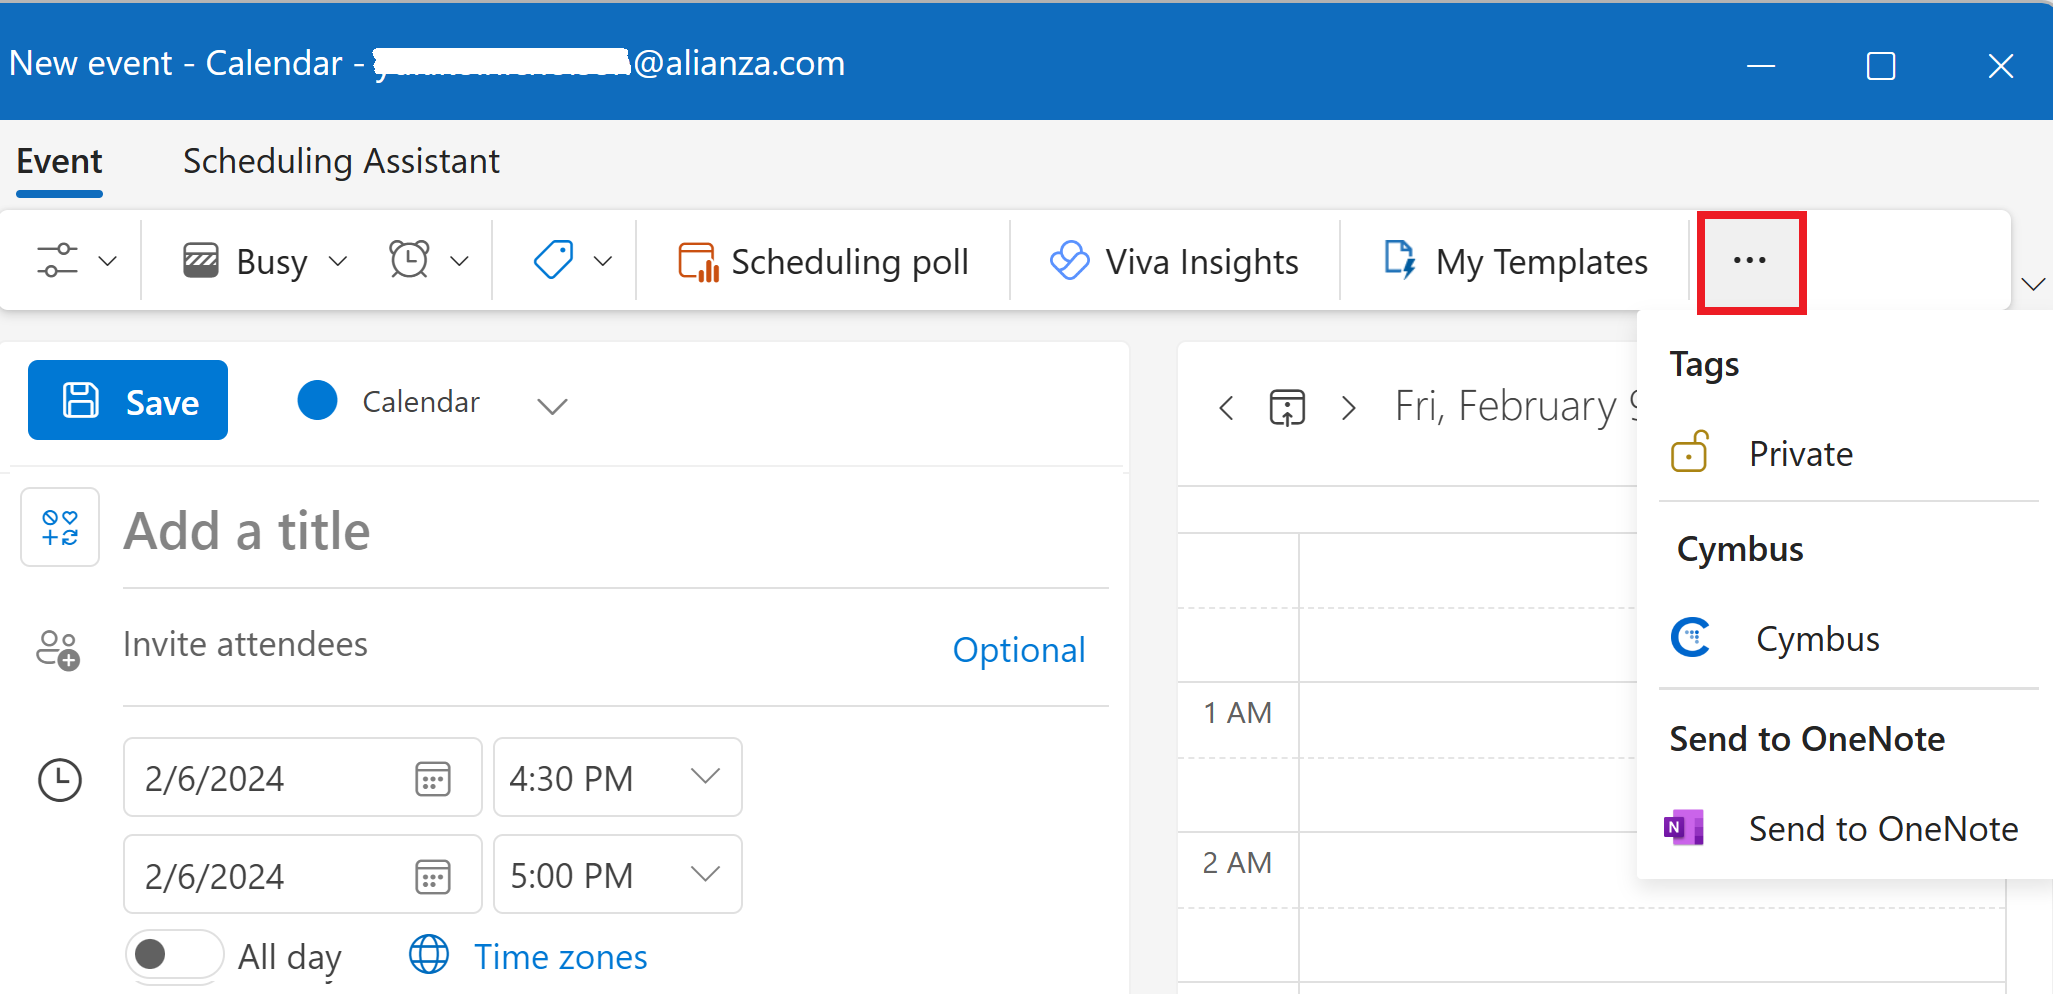
On the tool bar, click the three-dots button to reveal the Cymbus add-in. Click Cymbus to open the add-in.

Click Sign In, then click Allow to open a new window.
Log in to the Cymbus add-in using your Cymbus account, which is different from your Microsoft account.
In the right pane, configure the Cymbus meeting settings, including the Meeting ID, waiting room and a passcode settings as needed.

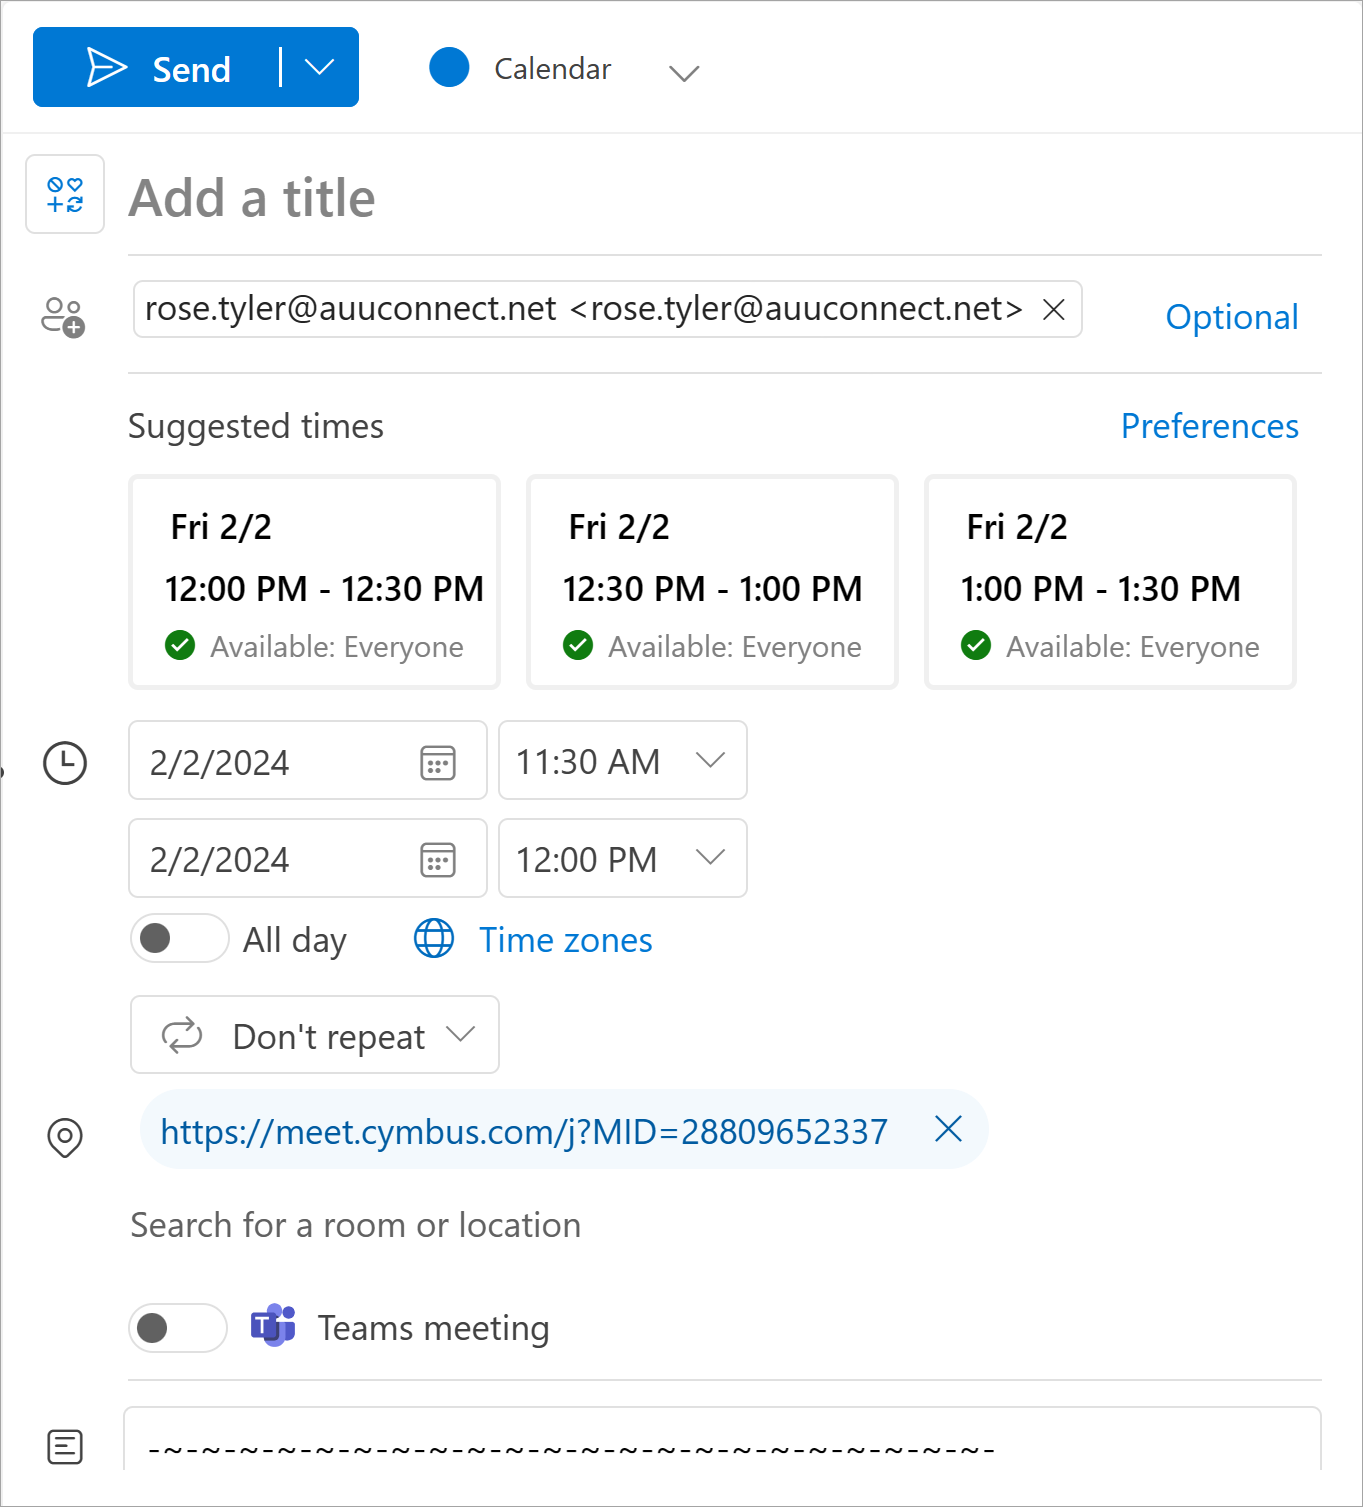
Click Add Cymbus Meeting on the right pane. The meeting link is added to the invite.

In the New event dialog, add participants and set the time, recurrence, and notification reminders.
Click Save to send the invite. Wait for some time to sync Outlook with Cymbus.
The scheduled meeting appears in your Outlook. In the Cymbus app, click Refresh on the Upcoming list to see the new meeting.
Invitees receive your invite in their email inbox. Use Outlook to see their responses.
Duplicate a Meeting
On Outlook for Windows, do not use the option to duplicate a Cymbus meeting. Duplicated meetings do not show up in the Cymbus app. Instead, create a meeting using the Cymbus side bar as described in the previous section.
Change a Meeting
Use Outlook to change a meeting that was originally scheduled by Outlook. Do not use the Cymbus app to do so, because it does not notify other participants or sync your Outlook.
No Drag and Drop
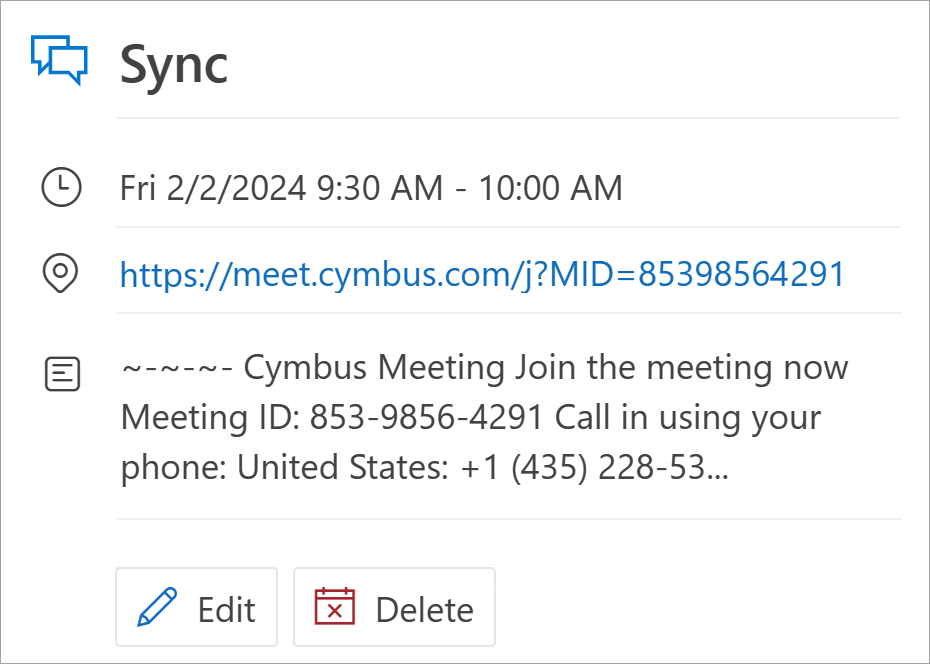
Do not drag and drop to move the meeting in the calendar, especially on Mac computers, because the meeting time cannot sync with the Cymbus add-in. Make sure to click Edit to open a pop-up and change the meeting time there.
In Outlook, select the meeting you want to change.
Click Edit at the bottom of the pop-up. Pick which event(s) to edit if this is a recurring meeting.

Make the change you want and click Send.
Editing Recurring Meetings
To enable/disable passcode or the waiting room or to change a passcode for a recurring meeting, apply the change to the entire series; these changes cannot be made to just one occurrence of the recurring meetings.
When making a change to This and all following events, the meetings are updated correctly in both Outlook and Cymbus; however, the previous meetings in the edited series no longer appear in the Cymbus app. Use Outlook to view previous meetings if necessary.
Cancel a Meeting
Outlook cannot sync with Cymbus for cancelled meetings. So if a meeting needs to be canceled, it must be deleted in both Outlook and Cymbus.
In Outlook, select the meeting you want to cancel.
Click Delete at the bottom of the pop-up, and then click Send.
Open Cymbus and select the meeting you want to cancel.
Cancel the meeting by clicking
 More then Cancel.