Upload Media Files
Media Files supports MP3 and WAV files under 10 MB each. Up to 50 audio files can be uploaded at a time.
Go to Business Cloud > Media Files.
Click [Upload] at the top right of the page.

Click the menu and select how the file will be used:
AA Prompts can be used in auto-attendant Menu, Message, and Directory routes. See the Routes Guide for details.
Music On Hold files can also be assigned to the account, individual users, hunt groups, and queues to give callers a custom experience.
Queue Announcements are prompts, messages, or music that callers hear when they reach a queue to customize the experience. See Queues and Queue Announcements for details.
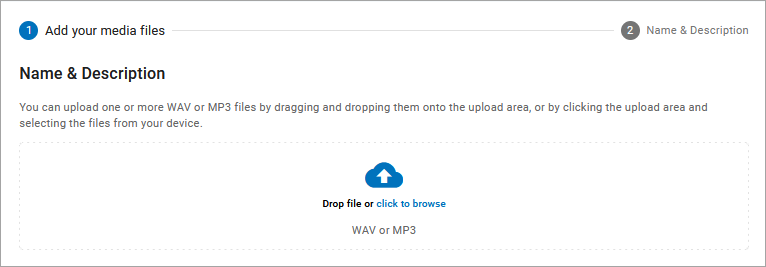
Add Media Files. Drag and drop up to 50 MP3 or WAV files into the upload area, or click the link to select the file(s) from your computer.

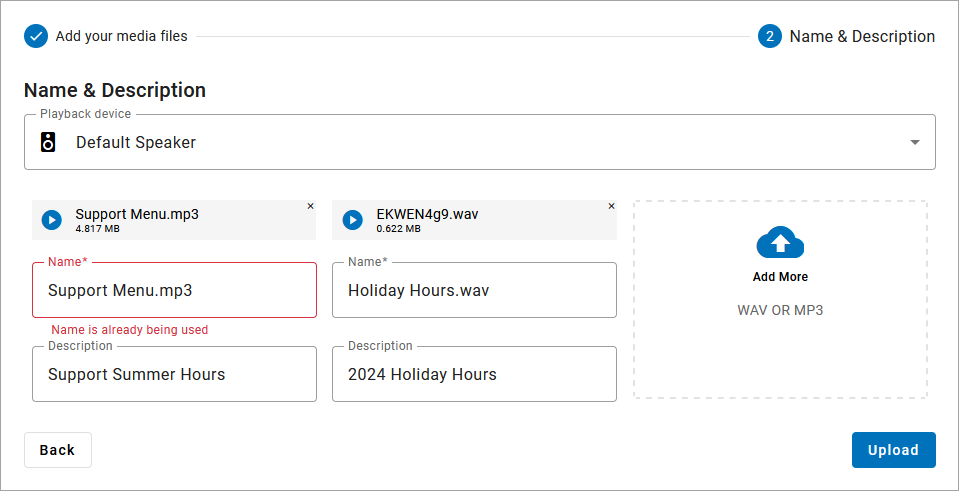
Name and Description. Before uploading the file(s) to the account, edit the file name and description (optional) to make it easier to identify later. Each file name must be unique.
If needed, click
 Play to listen to the file or X to remove it.
To add files to the upload, drag and drop them into the upload area.
When you’re ready to add these files to the library, click [Upload]. The files will be added to the library shortly; small files will take a few seconds, while large files may take a few minutes. Do not retry the upload during this time.

Once the upload is processed, the audio files are added to the Media Files library.
Audio Quality
Music On Hold files are optimized for use by the phone system, which will result in some degree of quality loss. To hear what it sounds like, click the  play button on the right or call a phone number on your account and ask to be placed on hold.