User Groups
The following information is for Account Managers and Super Admin users only. See User Access Levels to learn more.
User Groups enable account end users to be segmented by location, department, skill-set, language, or any other criteria while continuing the use of extension-to-extension dialing between all users on the account.
The most common use case is to create groups based on locations and restrict admin access to a subset of users in order to maintain data privacy and complement an organizational structure. As such, Admin end users assigned to a group can only access other users (and phone numbers associated with those users) in the same group. However, admin end users who are not assigned to a group can access all users.
To see which group a user is assigned to, go to the user's Settings tab.

Add a User Group
Users can only be assigned to one group, so it's best to create groups based on inclusive categories rather than narrow criteria. Only service provider users, Account Managers, and Super Admin end users can add and edit user groups.
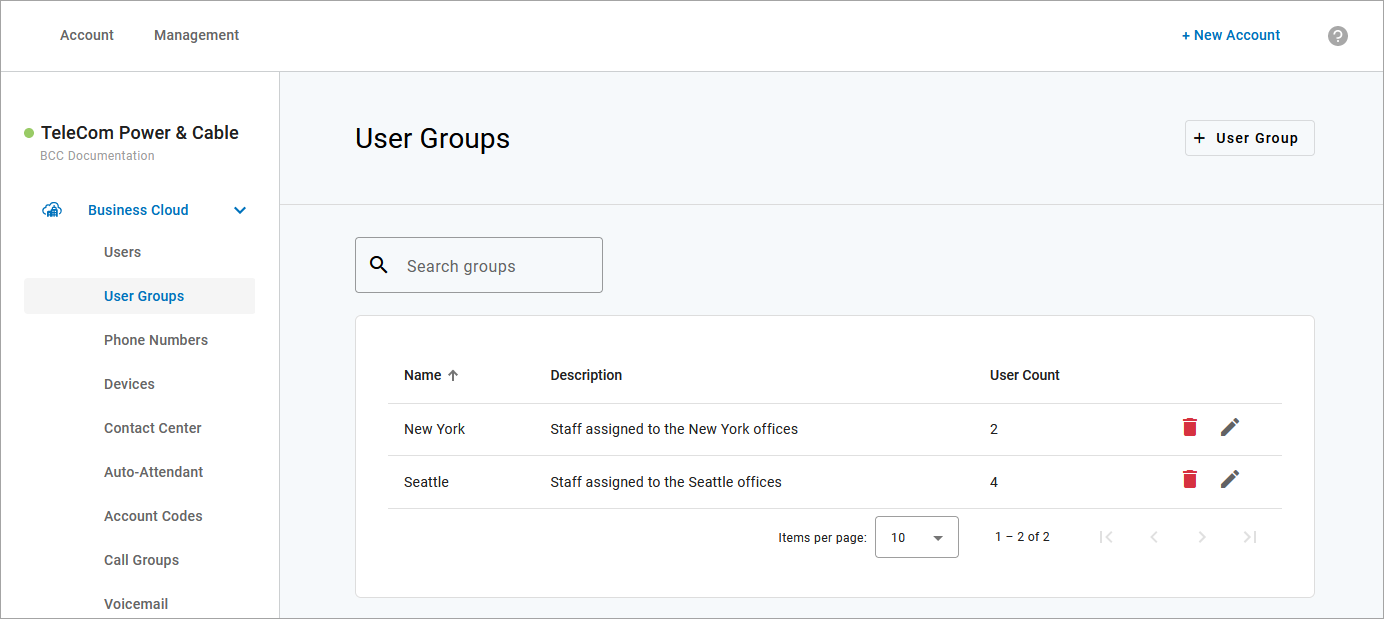
Go to Business Cloud Communications > User Groups.
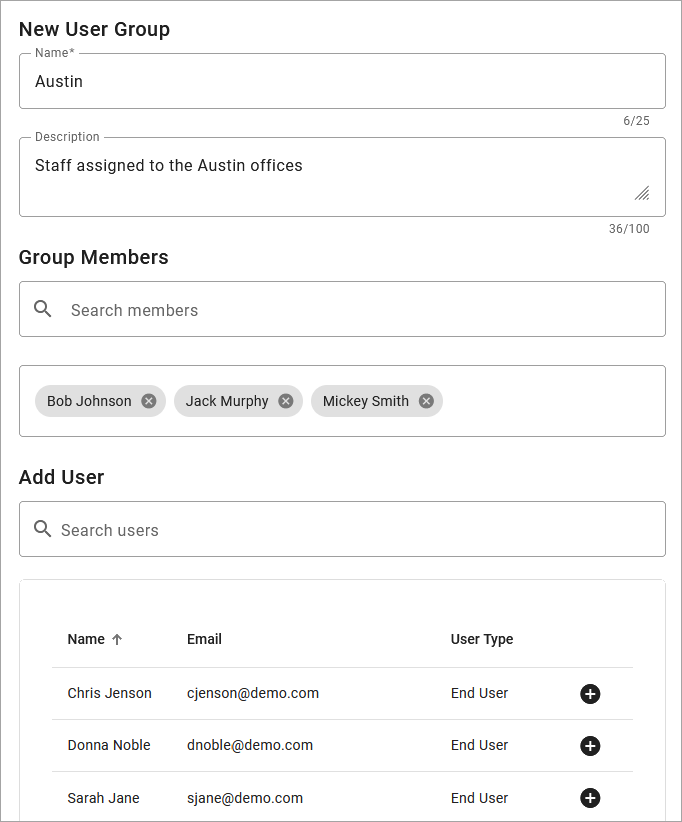
Click [+ User Group] in the top right.
Enter a name and brief description. The name will be displayed in user group filters throughout the account, so give it a name that will be easily recognized.
Search or scroll through the list of users and click
 Add to assign a user to the group.
Users already assigned to a group will not appear in the list.
To maintain full account access, Super Admin and Account Manager end users cannot be assigned to a group.
Once you've added all the necessary users, click [Save].
 |
Add or Remove Users in a Group
Groups can be renamed, and users can be added or removed as needed. If a user needs to be moved to a different group, first remove the user from their current group, then assign them to the new one. To see which group a user is assigned, go to the user's Settings tab.
Go to Account > User Groups.
Locate the group and click the
 Edit icon on the right.
To locate the group a user is in, enter the user's name in the search bar above the table.
Edit the name and description and add or remove users as needed.
Click [Save].
Filter by Group
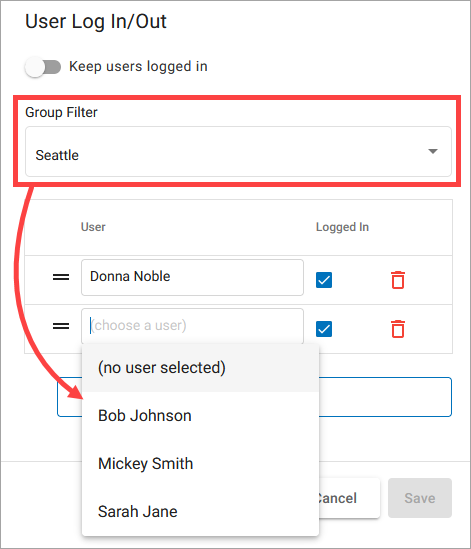
User Groups can be set as filter criteria to narrow a list of users or phone numbers or users to a particular group in the following features, so it's easier to find what you need:
For example, if creating an auto-attendant hunt group for the Seattle office, you can filter the user list by that group to avoid adding a user from the New York office.
Users that are not in a group and phone numbers that are not assigned to users in a group will be displayed in the list, even if the Group Filter is set.
 |