Voicemail
Does your business need a voicemail box? Many businesses need only one, while others might need a few, and some are satisfied with their on-premises voicemail solution or don’t need voicemail at all.
Voicemail boxes are set up by line, not by user, which makes it easier to share. One voicemail box can be assigned to a single line or be shared by multiple lines. Set it up your way.
Need only one voicemail box for the company? Create one voicemail box and assign all of your lines to it.
Need one for customer service and another for the manager? Set up multiple boxes and assign your lines as necessary.
Don’t need voicemail? It’s turned off by default, so there’s nothing to disable.
In Lines, you can see which voicemail box is assigned to the line, so you’ll know where your calls are going. To add a new voicemail box, please contact your service provider.
Voicemail Access
Dial the Voicemail Management star code to access the messages for that line, record a greeting, or update the PIN. Remember, all lines assigned to the box will use the same PIN. Refer to Voicemail Access for details.
Voicemail Box Management
To manage your voicemail boxes, go to . There you can see all of your voicemail boxes, the lines they’re assigned to, and the email addresses messages will be sent to.
Select a box to view and edit its settings, or click to add a new one.
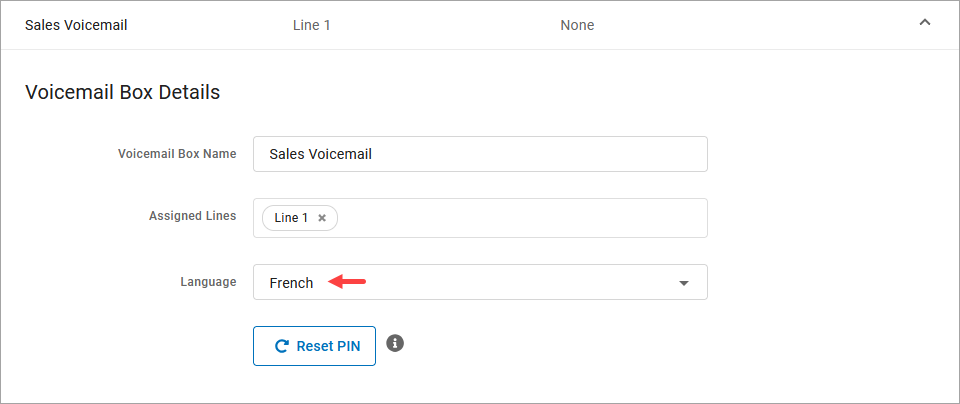
Voicemail Box Details
 |
Field | Description |
|---|---|
Voicemail Box Name | Enter or edit the name of the voicemail box. |
Assigned Lines | Assign a new line from the drop-down menu. Click X to unassign a particular line from the box. |
Language | The language used for the voicemail menu audio prompts and forwarded Voicemail to Email messages:
|
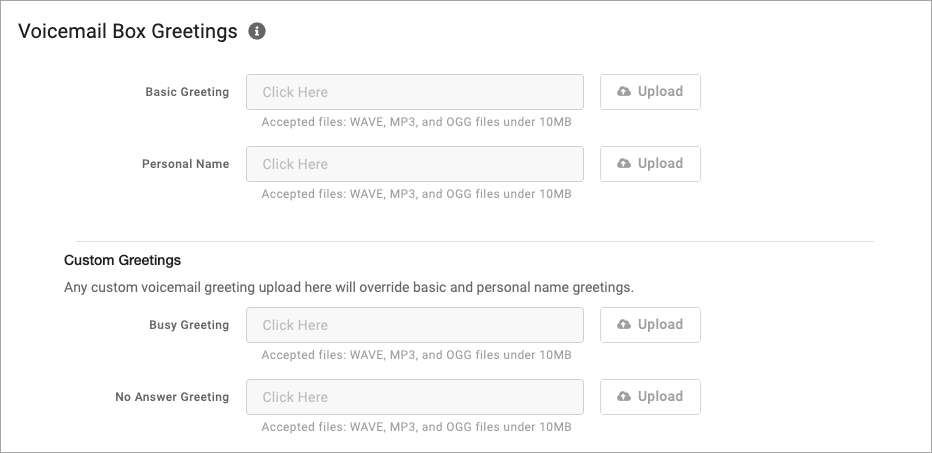
Voicemail Box Greetings
Upload and manage voicemail greetings (Basic, Busy, No Answer) and personal name recordings. Click the field to select a file from your computer, then click [Upload]. The upload will accept MP3, OGG, and WAV files that are less than 10MB.
 |
Messages
Voicemail messages are stored in the voicemail box, which can be accessed here or by dialing in (see Voicemail Access). Messages can be sorted by Time/Date, Length, and Status (New or Saved).
 Download. Save a copy of the message to your computer as an MP3 file.
  Save. Change the status of the message to Saved.
 Delete. Delete this message from the box. To delete all messages at once, click in the top right.
Message Waiting Indicator
The message waiting indicator (MWI) on your device notifies you when a new voicemail message waiting to be retrieved. When you’ve listened to, saved, or deleted the message, the MWI will turn off.
Storage Limit
Voicemail boxes do not have a storage space limit, and messages are stored indefinitely. Individual messages are limited to 5 minutes.
Message Settings
Forward Voicemail to Email
All voicemail boxes have the option to forward voicemail messages to one or more email addresses. When a message is left on the voicemail box, an email notification is sent to the specified email address(es) with the message recording attached as an MP3 file.

In the voicemail box, scroll down to .
Check the box for Forward Messages by Email.
Optionally, check the box for Keep a copy in voicemail box.
When checked, the message waiting indicator (MWI) on the user’s device will stay on until the user listens to or deletes the message from their device or the Voice Portal.
If unchecked, voicemail messages are removed from the voicemail box when forwarded to email.
In the field below, enter one or more email addresses in the field below separated by commas.
Click [Save].
Example Email
 |
"From" Email Address
Forwarded voicemails are sent from noreply@cymbus.com. Please remember to whitelist this address so the emails can be delivered to your inbox.