Navigate the User Voice Portal
The Voice Portal is a control center where you can manage your voice services, including who can contact you, how they will reach you, and when they can reach you. Many calling features can be managed via star codes, but some things are easier to manage online.
Your account is laid out on a single page, so it's easy to navigate. The sections include: User Information, Phone Numbers, Call Screening, Call Handling, Call Recording, and Voicemail.
User Information
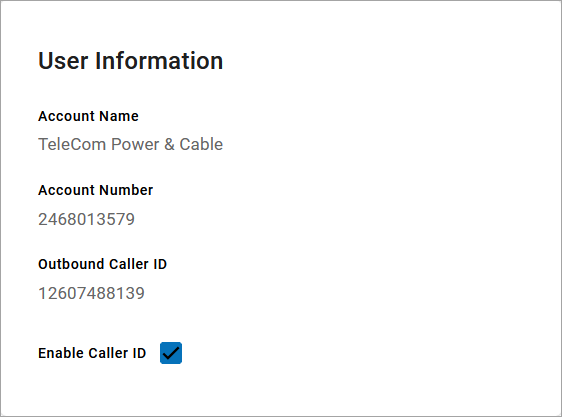
The User Info section displays your account name and number, and the phone number (if any) used as your outbound caller ID.
The Enable Caller ID setting determines whether your caller ID is or is not sent when placing an outbound call. Check this box if you want to send your name and phone number to the call recipient or uncheck it to display your caller ID as BLOCKED. Please note, even if the setting is disabled, the number listed in the Outbound Caller ID field will still be sent with 911 calls. Caller ID setting can also be managed by dialing star codes.
 |
Phone Numbers
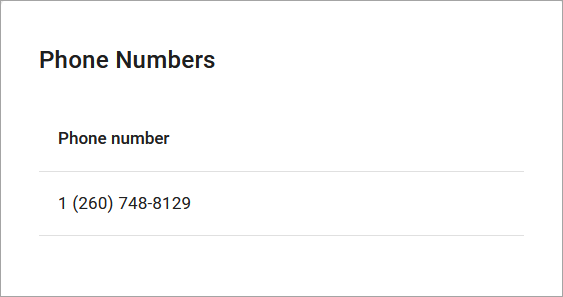
This is a list of the phone number(s) that are routed to you and your device(s). To add or remove a phone number, please contact Customer Support.
 |
Devices
The device(s) and lines assigned to you are listed under Devices.
 |
UC Apps
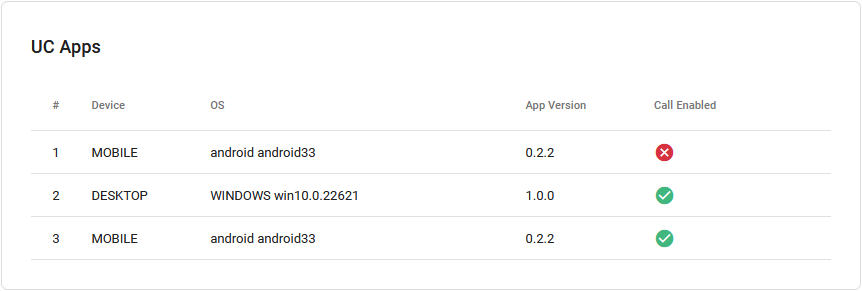
Your UC apps are listed here. Each configured app identifies the type of device (desktop or mobile), operating system, app version, and whether it is currently able to receive calls. Apps which are logged out or otherwise not connected to the network show a red X.
E911 Address
In the event a 911 call is placed from your phone number, emergency services will be dispatched to the address listed here. If this is not the address of your physical location, please click the [Edit E911 Address] button and update it. See Update Your E911 Address for more information.

Important
If any of your account information is NOT correct, or if you cannot edit your E911 Record (either the button isn’t there or you get an error), please contact Customer Service right away to get it updated.
The following information applies to end users who are managing their own accounts. For Admin users, see Manage E911 Address.
The E911 Address registered to your phone number will tell emergency services your precise location in the event you dial 911. It's important to keep this address up to date so they go to the correct location. Rather than calling Customer Support to update it on your behalf, you can update it yourself.
Log in to the portal.
Scroll down to the E911 Address section and click the pencil icon on the right.
Uncheck Same as CSR.
Make any necessary updates to the E911 Record fields to identify the precise location where your device is located. If any additional information is required (such as a suite, apartment, building, etc.), expand Manual Entry for those fields.
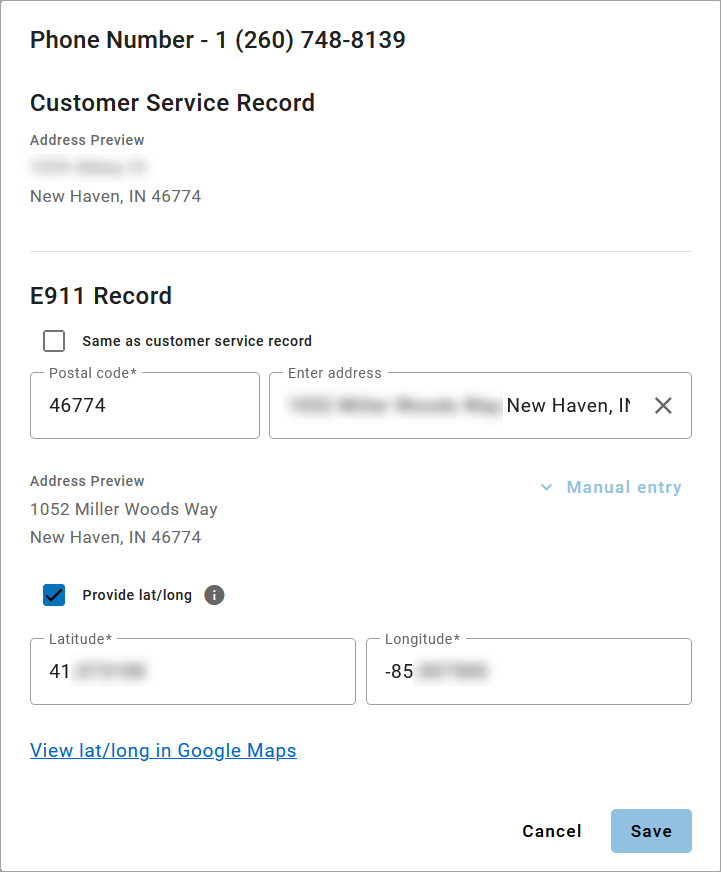
Provide lat/long is optional. Check this box to view and/or modify the latitude and longitude coordinates for the E911 address. These coordinates determine the PSAP responsible for receiving the 911 call, not the ambulance dispatch location. This additional information is useful for new addresses that haven't yet been registered with the Master Street Address Guide (MSAG).
When checked, Lat/Long is automatically generated using the provided address. Click View Lat/Long in Google Maps to see the approximate location and make sure it's at least in your neighborhood.
When you’re done, click [Save]. It may take several hours for the changes to take effect.
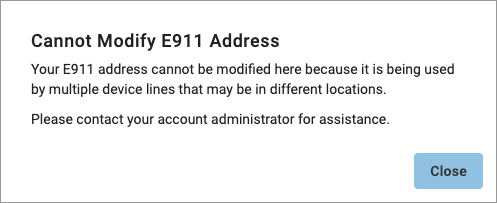
Error: Cannot Modify E911 Address
To make sure emergency services can be dispatched to the correct address, an E911 address that is assigned to multiple numbers cannot be modified by a single user from the Voice Portal. For example, a business may use the same office location for all of their lines. If an employee begins to work from home and wants to change their E911 address, that change would inadvertently affect all other lines.
If you get this error, please contact an account administrator to change your E911 address without affecting other lines.
 |
Call Screening
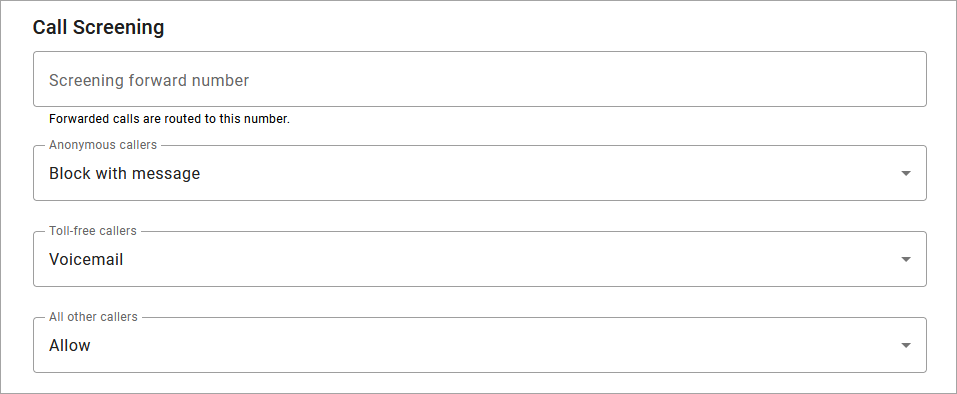
Call Screening determines how incoming calls are routed under various circumstances. Choose how to handle calls from Anonymous Callers, Toll-Free Callers, and All Other Callers—including specific phone numbers: Allow, Allow with Priority Ring, Block, Block with Message, Forward, or Voicemail. See Call Screening for more information.
Call Handling
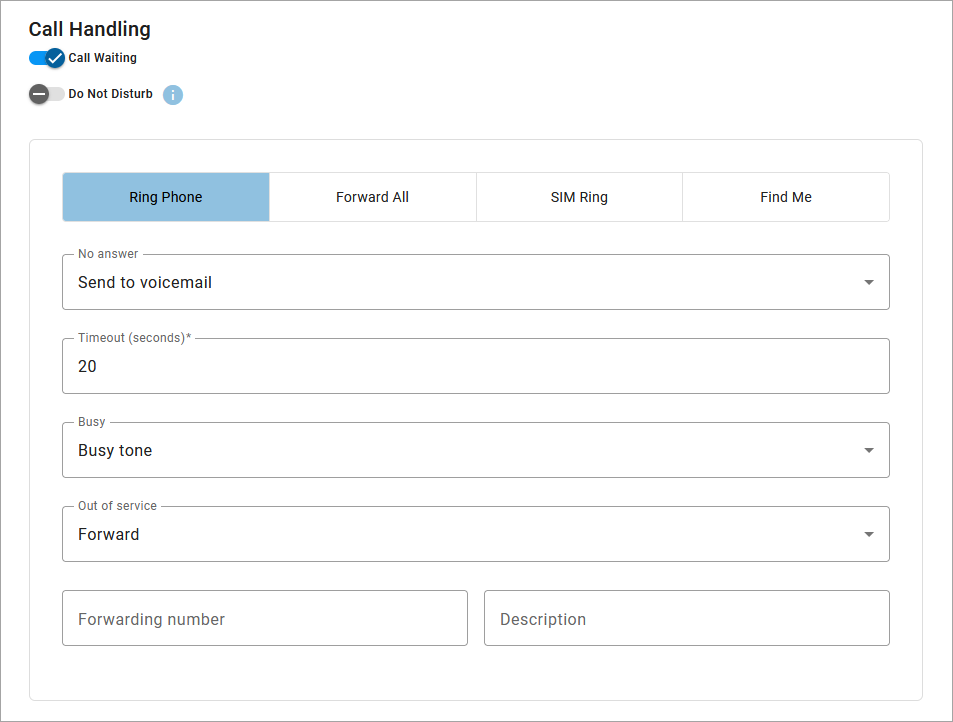
Call Handling determines how incoming calls are routed under various circumstances. In the first section, create or manage your Call Schedules, Call Waiting, and Do Not Disturb settings. Just below that, select and configure a ring strategy: Ring Phone, Forward All, Simultaneous Ring, and Find Me/Follow Me. See Call Handling for more information.
Call Recording
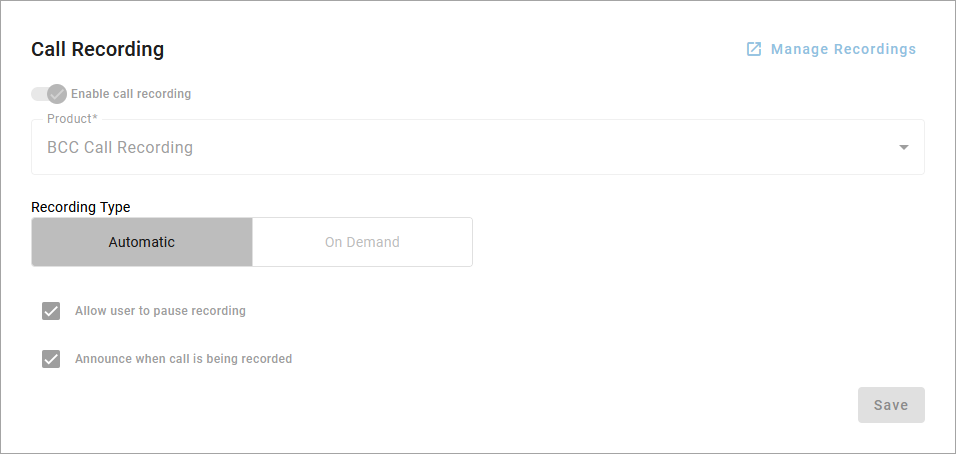
The Call Recording section displays your settings in a view-only format. Use the Call Recording star codes to start, pause, resume, or stop a recording mid-call, depending on your configuration. See Call Recording for more information.
Call Recording is available only to users with Advanced and Professional feature plans. If the is disabled (greyed out) and you wish to use it, contact your service provider for assistance.
Voicemail
A voicemail box was assigned to you with your Cloud PBX service. In the Voice Portal, you can upload your voicemail greetings and personal name recordings, view and manage any saved messages, and forward your voicemails to email. See Voicemail for details.
To manage voicemail messages and greetings by dialing in to the voicemail box, see Voicemail Access.
Tip
Remember to save your changes before closing the window!