Voicemail
Voicemail is a huge part of how we communicate, and we make it very customizable. In addition to customizing the greetings, you can set up preferences for an individual user—including Voicemail to Email, where you can choose to forward voicemail messages as an MP3 to specified email address(es).
Users: Sign in to the Voice Portal and scroll down to the Voicemail section. There, you can upload your voicemail greetings and personal name recordings, view and manage any saved messages, and set up Forward Voicemail to Email.
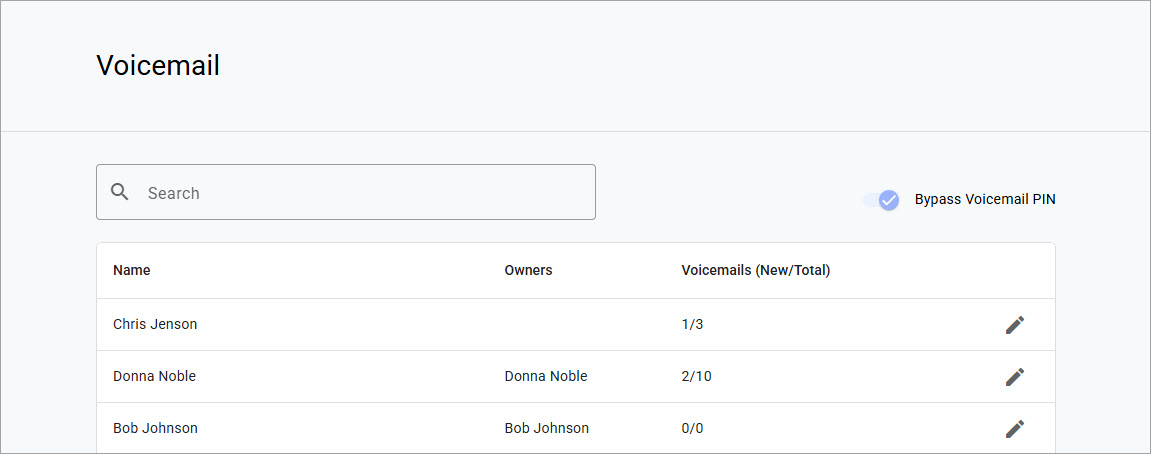
Admins: To access the voicemail boxes on the account, go to . While this section discusses how to manage voicemail boxes at the account level, they can also be managed at the user level (see Manage a User's Voicemail Box for details). The settings for individual voicemail boxes are the same in either location.
 |
Voicemail Access
Voicemail messages and greetings can also be managed by dialing in to the voicemail box. See Voicemail Access for details.
Bypass Voicemail PIN
When Bypass Voicemail PIN is enabled, users accessing their voicemail box from their own phone number are automatically authenticated—no PIN required. For the security of all users, a PIN is always required to access a voicemail box from an external phone number and to change the PIN from the voicemail menu.
To ensure all users' messages remain protected, a PIN is always required to access a voicemail box from an external phone number and to change the PIN from the voicemail menu.
To enable this feature for the account, go to and toggle on Bypass Voicemail PIN. If you don't have access to this setting, contact a higher-level admin for assistance.
Voicemail Box Details
 |
Field | Description |
|---|---|
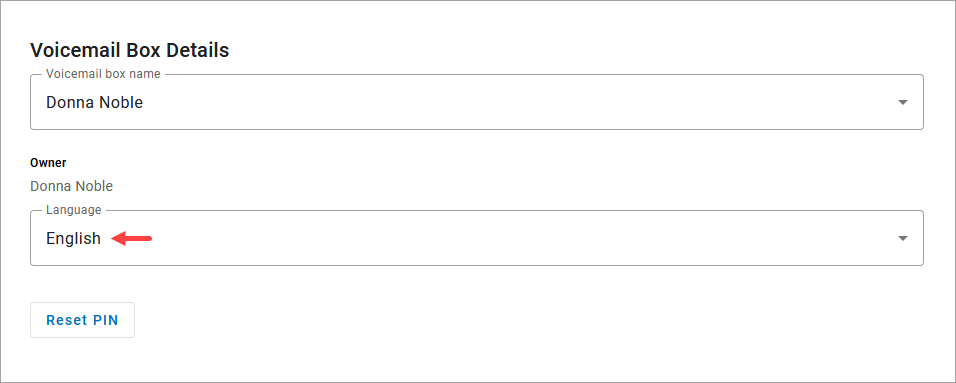
Voicemail Box Name | Enter or edit the name of the voicemail box. In the tab, you can choose which voicemail box to assign to a particular user. |
Owner | The name of the user(s) this voicemail box is assigned to. This is not an editable field. |
Language | The language used for the voicemail menu audio prompts and forwarded Voicemail to Email messages:
If this voicemail box is assigned to multiple users, changing this setting for one user will change it for the other users. This is separate from the Language setting in the user's Settings tab, which applies to the web portal UI, telephone user interface (TUI) audio prompts, and system-generated emails. Remember to set both. |
Voicemail Box Greetings
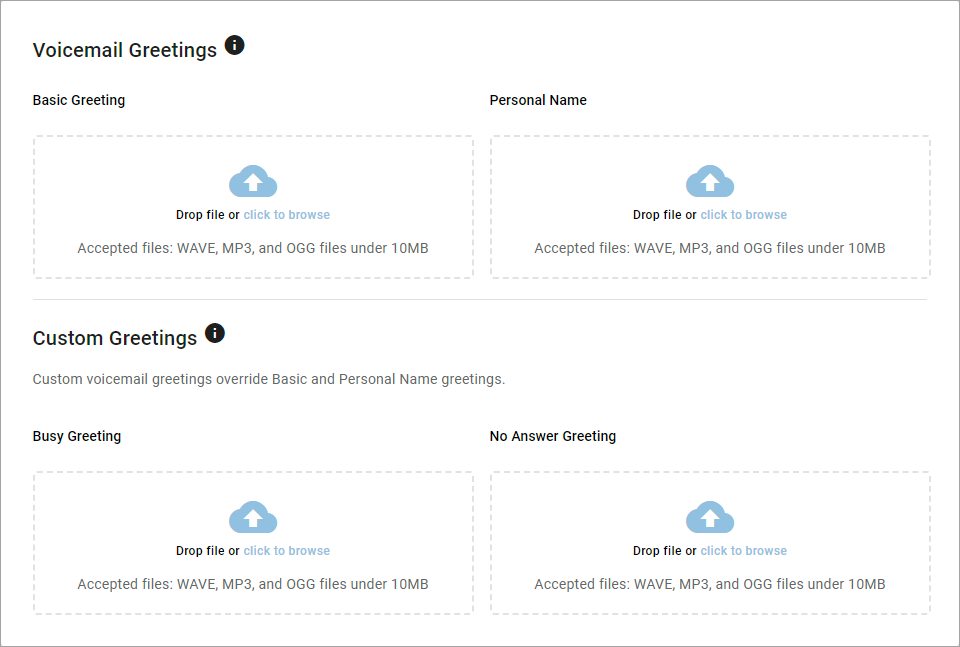
Upload and manage voicemail greetings (Basic, Busy, No Answer) and personal name recordings. Click the field to select a file from your computer, then click [Upload]. The upload will accept MP3, OGG, and WAV files that are less than 10MB.
Message Settings
Forward Voicemail to Email
All voicemail boxes have the option to forward voicemail messages to one or more email addresses. When a message is left on the voicemail box, an email notification is sent to the specified email address(es) with the message recording attached as an MP3 file.
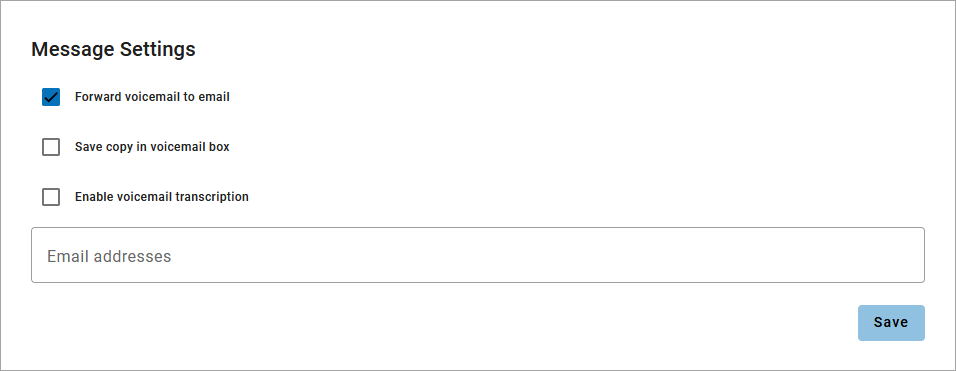
In the voicemail box, scroll down to .
Check the box for Forward voicemail to email.
Optionally, check the box for Save copy in voicemail box.
When checked, the message waiting indicator (MWI) on the user’s device will stay on until the user listens to or deletes the message from their device or the Voice Portal.
If unchecked, voicemail messages are removed from the voicemail box when forwarded to email.
Optionally, check the box for Enable voicemail transcription.
In the field below, enter one or more email addresses in the field below separated by commas.
Click [Save].
Example Email
 |
"From" Email Address
Forwarded voicemails are sent from noreply@cymbus.com. Please remember to whitelist this address so the emails can be delivered to your inbox.
Voicemail Transcription
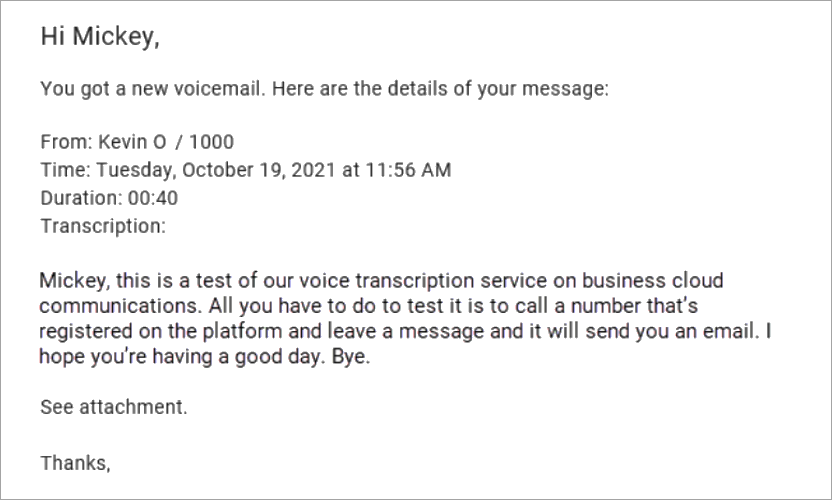
Sometimes reading a voicemail message is easier than listening to it. Voicemail transcription, available only on Business Cloud Communications and , takes the audio from the voicemail message and converts it to text, which is then forwarded to one or more email addresses with or without the message attached as an MP3 file (depending on if you also have forwarding enabled).
With voicemail transcription, you can:
Get important messages when you can’t take a call.
Browse your voicemails in email, rather than listening and re-listening.
Keep searchable records of business voicemails.
Easily forward messages you’ve received.
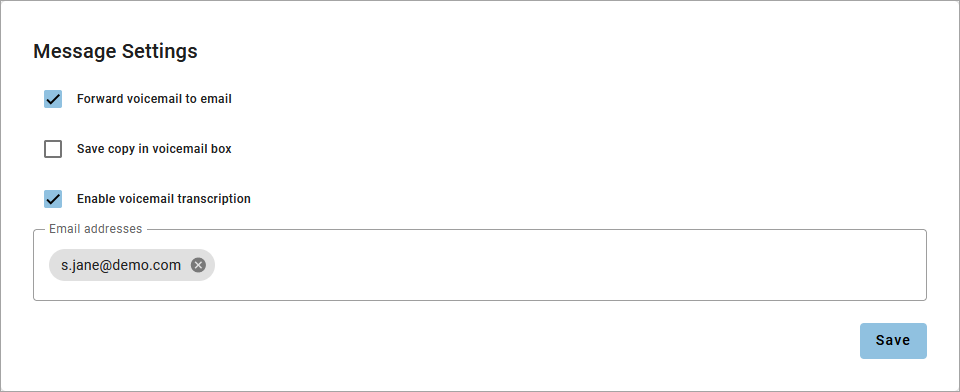
In the voicemail box, scroll down to .
Check the box for Enable Transcription.
Optionally, check the box for Forward Voicemail to Email to email an MP3 of the message and Keep a copy in voicemail box if you want to save a copy of the message in the voicemail box when it's forwarded.
In the field below, enter one or more email addresses in the field below separated by commas (required).
Click [Save].
Voicemail messages will be transcribed and sent to the email address(es) indicated here. If Forward Voicemail to Email is also enabled, an MP3 of the message will be attached to the email.
Example Email
US English
Voicemails can only be transcribed from US English. If a message cannot be transcribed for any reason, such as poor audio quality, an email will still be sent with a message saying, "Message could not be transcribed."
HIPAA
Voicemail transcription is not HIPAA compliant. If you need to maintain HIPAA compliance, we recommend that you not enable transcription.
Messages
Voicemail messages are stored in the voicemail box, which can be accessed here or by dialing in (see Voicemail Access). Messages can be sorted by Time/Date, Length, and Status (New or Saved).
Please note, as an Account Manager or Admin user, you can download only your own voicemail messages.
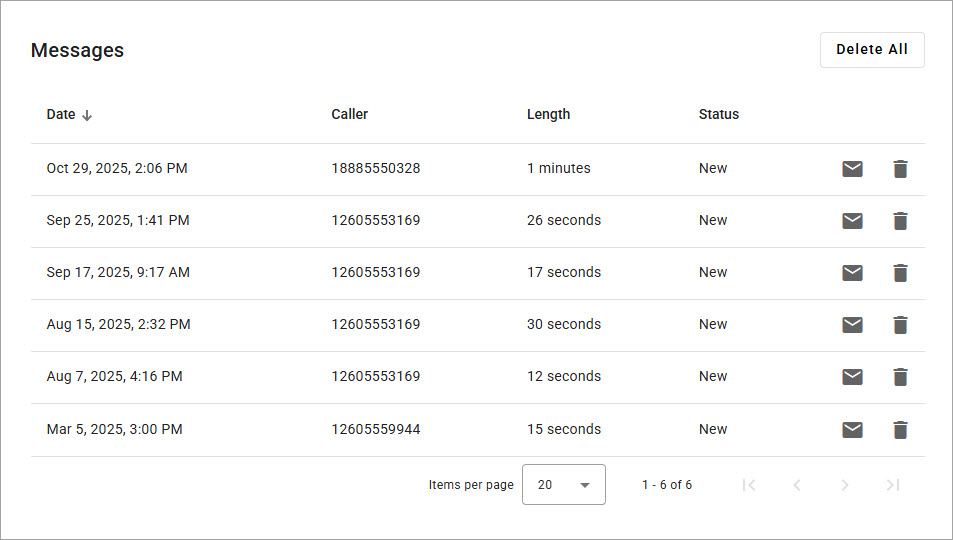 |
 Download. Save a copy of the message to your computer as an MP3 file.
  Save. Change the status of the message to Saved.
 Delete. Delete this message from the box. To delete all messages at once, click in the top right.
Message Waiting Indicator
The message waiting indicator (MWI) on your device notifies you when a new voicemail message waiting to be retrieved. When you’ve listened to, saved, or deleted the message, the MWI will turn off.
Storage Limit
Voicemail boxes do not have a storage space limit, and messages are stored indefinitely. Individual messages are limited to 5 minutes.