Change Phone Number Destination
When a phone number is added to the account, a destination is assigned to direct callers to the right place. The destination can be changed at any time, such as when launching a new auto-attendant, or reassigning a phone number from one user to another.
To change the destination of a phone number:
Go to the Phone Numbers page.
Locate the phone number you want to modify and click the
 destination icon on the right.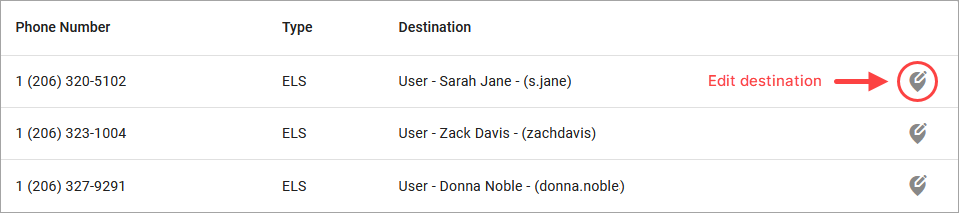
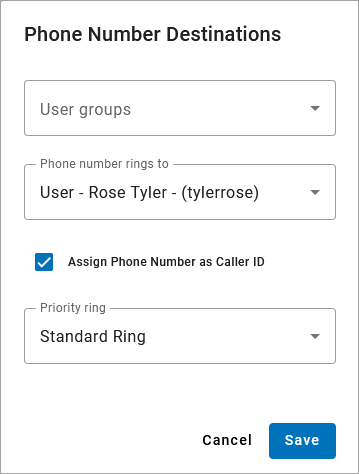
Below Phone Number Destinations, fill out the following:
User groups: Select a group to narrow the Phone Number Rings To options below to only those users (optional) or leave it blank to show all possible destinations.
Phone number rings to:Select a new destination. Supported destinations include auto-attendants, hunt groups, queues, users, and virtual faxes.
Assign Phone Number as Caller ID: If the destination is to a user, choose whether to assign this phone number as the user's caller ID. If unchecked, caller ID will be sent as .
To assign a different number as the user's caller ID, go to the user's Calls tab and select a number from the Caller ID field.
Priority ring: Select a priority ring tone (optional). For more details, see Priority Ring.
Click [Save]. The changes will be applied immediately.
Note
If you don't have access to the Phone Numbers page, please contact Customer Support for assistance.
Bulk Update Phone Numbers
To change the destination of multiple phone numbers at the same time, see Bulk Phone Number Management.