Account Settings
Account Call Settings
Call Park
 Account > Settings > Calls
The following information is for Admin users only. See End User Access for Business Cloud to learn more.
Call Park combines the elements of transferring a call and putting it on hold. Rather than having a caller try again later, or sending them to voicemail, the user can dial a star code to transfer the call to a virtual parking spot where the caller will remain on hold until the person they are calling becomes available.
Use Call Park
There are two ways to use Call Park:
To park and retrieve calls via star code, see Call Park Star Codes.
To assign a parking spot to a line on a user's device, see Call Park Line KeyCall Park Line Key.
Caller ID for Parked Calls
When a call is retrieved from a parking spot, the caller ID displays the original calling name and number, if available. If caller ID is not available, it is presented as Not Available or Anonymous. On Cloud PBX, when a call is retrieved from a parking spot, the caller ID displays the call park number.
Manage Parking Spots
To manage the parking spots on an account, go to Settings > Calls.
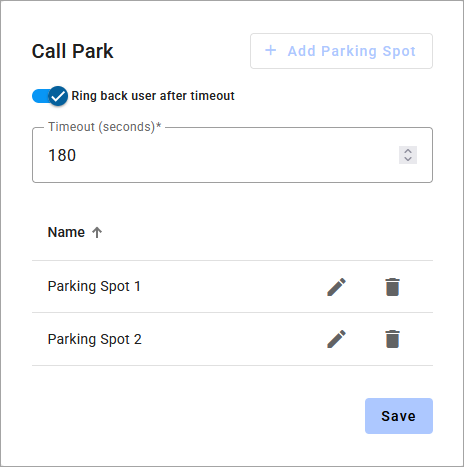 |
Auto Ringback
Auto Ringback prevents the parked caller from getting stuck in limbo. When a call is parked using a star code and is left in the parking spot for a specified amount of time, the system will automatically return the caller to the user who parked it. Auto Ringback is enabled with a recall timer of 180 seconds by default, but it can be disabled or modified at any time.
Go to Account > Settings > Calls.
Scroll down to Call Park.
Toggle on Ring back user after timeout.
Enter the number of seconds after which the parked call will ring back the user who parked it.
Click [Save].
Add Parking Spot
Go to Account > Settings > Calls.
Scroll down to Call Park and do one of the following:
New: Click [+ Add Parking Spot].
Edit: Click the
 pencil icon on the right.
Enter a name for the parking spot.
Click [Save] to implement your changes.
Delete Parking Spot
To delete a parking spot, click the trash  icon on the right, then click [Delete] to confirm.
Devices
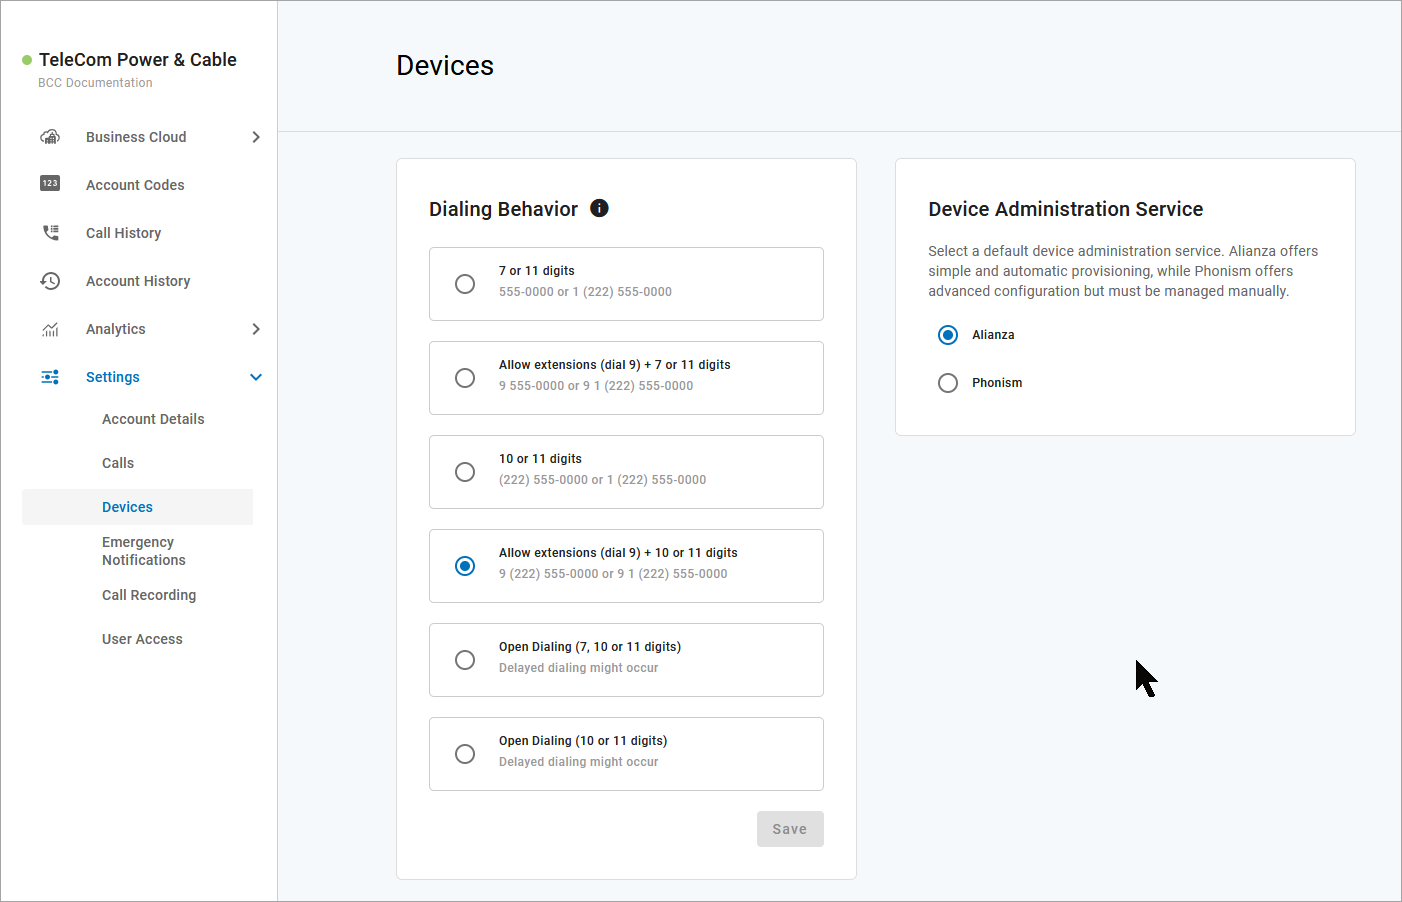
Dialing Behavior
Decide how your users will dial phone numbers when making calls.
Go to .
Under Dialing Behavior, choose one of the following:
7 or 11 digits
Allow extensions (dial 9) + 7 or 11 digits
10 or 11 digits
Allow extensions (dial 9) +10 or 11 digits
Open Dialing (7, 10, or 11 digits)
Open Dialing (10 or 11 digits)
Click .
Note
Dialing behavior that does not include 7-digit dialing requires the user to dial an area code for the call to complete. Calls placed without the area code will result in an error and a message saying, "Your call cannot be completed as dialed."
Device Administration Service
This setting is only available if the Phonism integration is enabled on your partition.
Select a default device administration service for devices on the account. Alianza offers simple and automatic device provisioning, while Phonism offers advanced configuration options that must be managed manually.
To set a default device administration service for all new accounts, see Account Defaults.
Regardless of which service you choose here, the administration service can also be modified at the device level. Devices which do not support Phonism will be provisioned with Alianza. See Phonism Device Management for details.
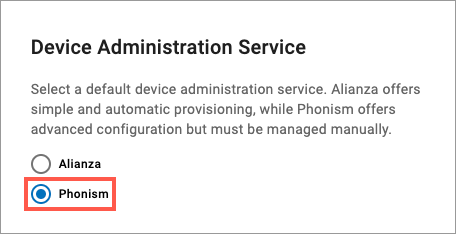
In the Alianza Admin Portal, navigate to .
Locate the Device Administration Service section and select Phonism.
In the alert dialog, choose whether the settings will apply all devices, or new devices only.
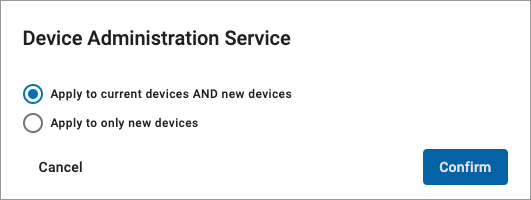
Click [Confirm].
If Phonism is applied to current devices, those devices will now reboot to switch provisioning services. See Phonism Device Migration Workflow for details.
Emergency Call Notifications
In recent years, the FCC has passed Kari’s Law and RAY BAUM’s Act to help expedite response to emergency services to callers and improve outcomes. As part of Kari’s Law, all multi-line telephone systems (MLTS) must be preconfigured to send a notification to an on-site location (like a front desk or security office) when a 911 call is made.
For Emergency Call Notifications to work, each phone number on the account must be successfully configured with a valid E911 record, which includes the physical address where the device is located and any other information necessary to precisely identify the caller’s location. It is the end user's responsibility to keep this information up to date, but they may need a reminder.
Alternative Solution
Emergency Call Notifications are required for any and all MLTS manufactured, imported, sold, leased, or installed after February 16, 2020. If your account already meets this requirement with an on-premises solution, select Alternative solution in use.
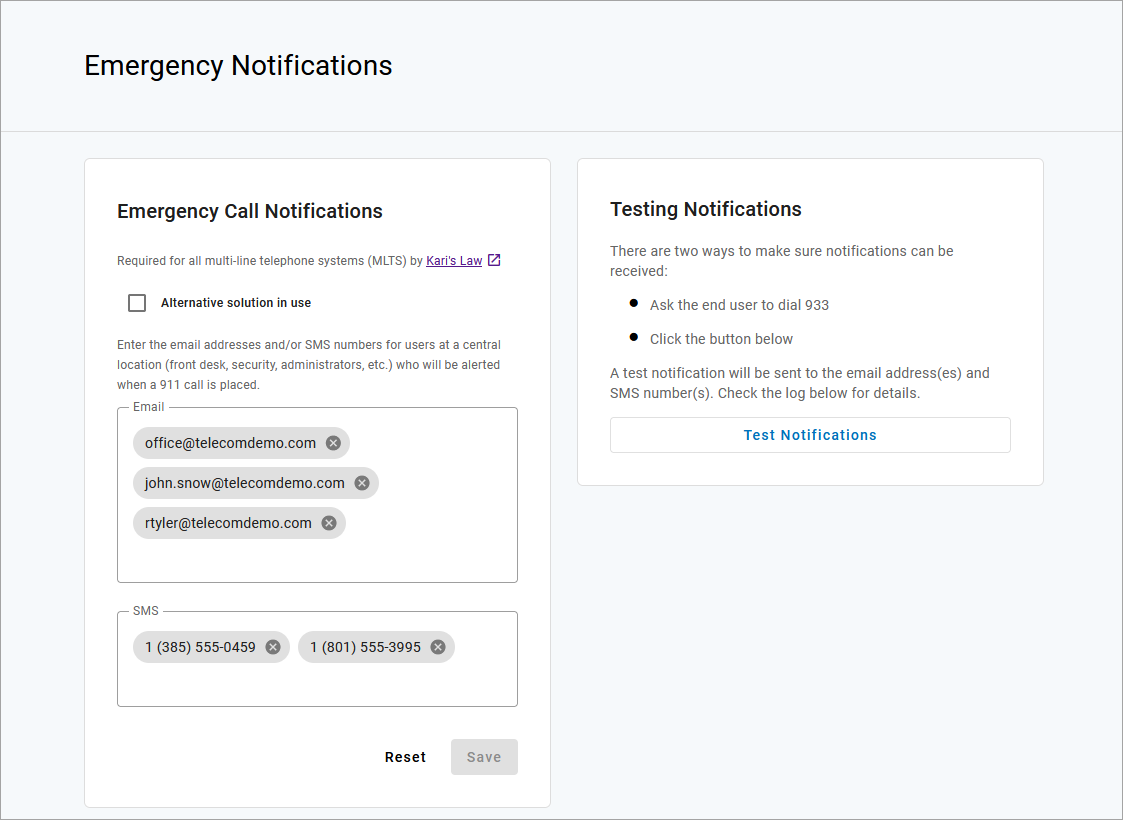
Configure Emergency Notifications
It is important that you choose to notify a central location where someone will see or hear the notification, such as a managed distribution list of on-site personnel (front desk, security office, administrators, etc.), rather than an individual who may or may not be at the location 100% of the time. While there isn't a limit on how many contacts can be entered here, make sure the number is reasonable for your organization.
In the portal, go to Settings > Emergency Notifications.
Identify the email address(es) and SMS-capable phone number(s) that will be notified when an emergency call is placed from a number on the account. Enter those email addresses and phone numbers in the portal and click [Save].
Now, when someone on your account dials 9-1-1, the emergency call is processed and a notification is sent to the recipients configured in the portal, so they are made aware of the situation and can assist emergency responders upon arrival.
Test Notifications
We strongly recommend testing the service after setting or changing the configuration to ensure it is properly configured. There are two ways to do this:
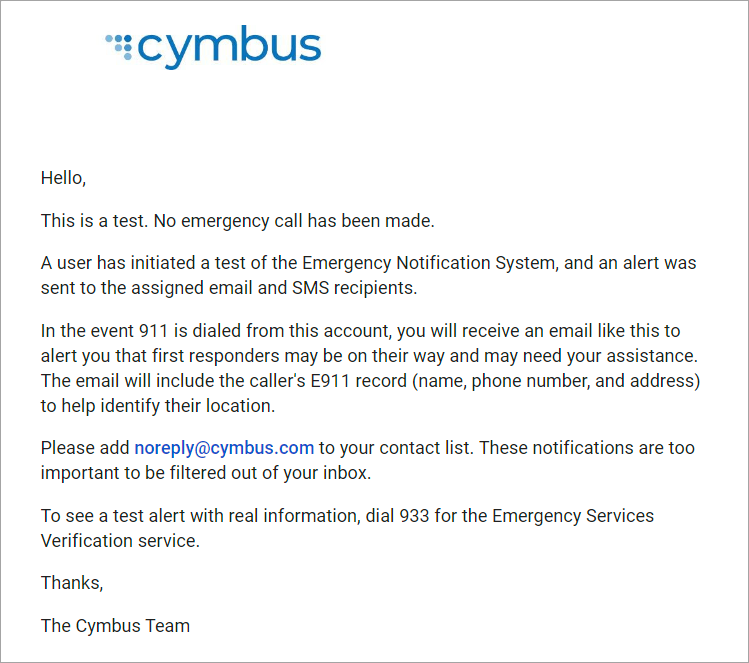
Click [Test Notifications] to send notifications to the email address(es) and SMS number(s) configured for the account.
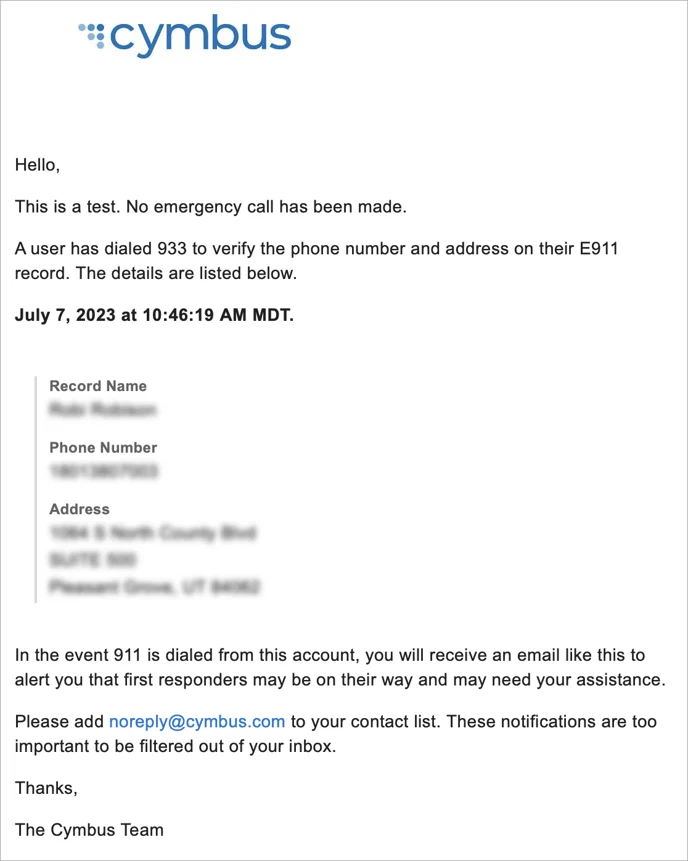
Ask the end user to dial 933 to verify their emergency call record with their E911 provider.
The call will be connected to an automated 911 verification service, which will play back the dialing phone number and its associated address. The end user is expected to contact their service provider if the information is incorrect or any changes are needed.
The end user should confirm that all recipients have received the notifications and that they understand its purpose.
SMS notifications include the type of message and caller details.
911 NOTIFICATION: Shirley Bennent (801-489-7891) 20MAY20 6:15 PM MST
Location: 1242 N 400 W, Suite 980, Pleasant Grove UT 84023
933 NOTIFICATION: Shirley Bennent (801-489-7891) 20MAY20 6:15 PM MST
Location: 1242 N 400 W, Suite 980, Pleasant Grove UT 84023
TEST NOTIFICATION: In the event a 911 call is placed, you will receive
a text like this one to notify you that first responders may be on their
way and may need your assistance.
The test notification will let you know this is only a test. In the event 911 is dialed, the notification email will include the name, phone number, and address on the E911 record, and additional details including the name of the device owner, the extension, device type, line name, and MAC address.
 |  |
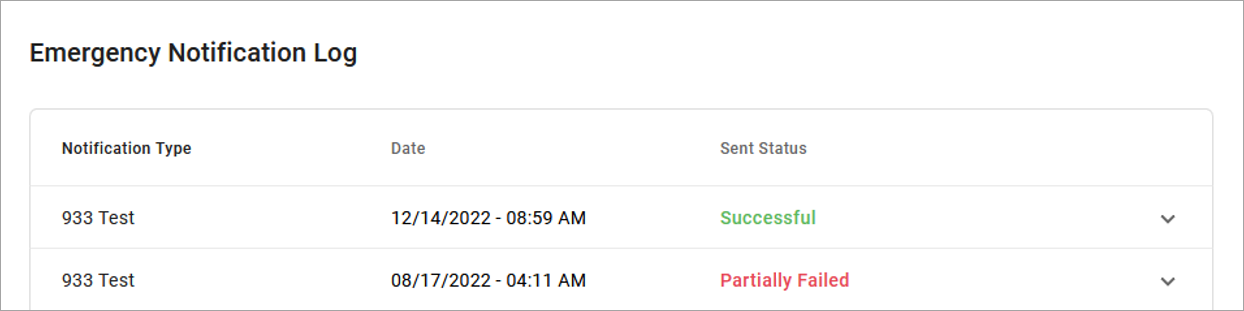
Emergency Notification Log
The Emergency Notification Log contains a complete history of all test and emergency call notifications sent for this account. The notification type is identified on the left, followed by the date and time and sent status:
Successful: The notification was successfully sent to all parties.
Partially Failed: The notification was sent to some but not all parties.
Failed. The notification was not sent.
Expand an entry for details:
 |

Frequently Asked Questions
A: Yes. If the Voice Portal Permission for Emergency Notification Configuration is set to Allow editing, Super Admins and Advanced Admins can configure emergency notifications for the account in the end user portal. Standard Admins and Basic Admins can view the settings and the notification log, but cannot make any changes.
A: Emails will come from noreply@cymbus.com and text messages will come from 1 (833) 210-3911. Be sure to send test notifications to make sure the end user's spam filters (text and email) will not prevent notification delivery.
A: Because Emergency Call Notifications are not marketing messages—they are required by the federal government—there is no way to “opt out.” However, if a recipient for these notifications is no longer appropriate, the user can contact their service provider or account administrator to update it.
A: Not currently. Emergency notifications are configured at the account level, and the concept of a "location" is not designed into the Alianza account structure at this time.
A: Yes. If the Voice Portal Permission for Emergency Notification Configuration is set to Allow editing, Super Admins and Advanced Admins can configure emergency notifications for the account in the end user portal. Standard Admins and Basic Admins can view the settings and the notification log, but cannot make any changes.
A: If the phone number dialing 911 does not have a valid E911 record, the emergency call notification will still be sent but it will not include information about the phone number from which the call was placed. The Phone Numbers report includes fields for the 911 address associated with each phone number. You can use this report to identify which numbers do not have a complete E911 record.
A: The "yellow dot" is to indicate the compliance requirement of an account (1) with multiple lines AND (2) that was created after Feb 16, 2020. All accounts can have ENS configured but accounts meeting those requirements will have the yellow dot to signal the Care Representative that the account is out of compliance and needs to be configured.